Ado Sector Campaign [Star Wars]
The Ado Sector Campaign was conducted from March to April 2020 amidst the COVID-19 Pandemic.
Part 1
Good morning everyone; in light of all of us being (rightly) stuck in our homes I endeavored to find a way to relieve some of the collective boredom and scratch at least a small portion of the gaming itch felt by my local gaming group. This intention plus the fact that I have just finished a large batch of Star Wars models resulted in the idea for a campaign.
The concept is that two of my friends, Matt and Will, run the map side of the campaign; moving assets around the map, making strategic decisions, etc. Battles resulting from this campaign are played out by myself and my wife or in the case of very quick and small games, solo. So far I have achieved the goal, all four people involved have been having a good time.
I am starting this series of posts well behind the current status of the campaign which is currently prosecuting turn 11. This is to ensure that any slip up of mine in writing does not reveal any sensitive information to either player who are not sure of each others positions and movements.

This campaign is centered on the Ado Sector in the mid rim and is set six months after the destruction of the second Death Star. The Emperor and Darth Vader are dead. The Empire still stands as a unified state under Sate Prestage but cracks are beginning to show and as anyone familiar with the old EU knows, the house of cards is about to come crashing down.
But this isn't a story about the larger geopolitical implications of this collapse. Rather, the focus is on a lonely Imperial Admiral desperately trying to maintain order in a backwater sector while dealing with a shortage of resources. The Moff for this sector has already abandoned his post and fled for Coruscant. The Grand Moff of the Over-Sector has all but abandoned the Ado Sector, believing it to be a lost cause and stripped much of the naval power from the area. Admiral Risser has no shortage of problems.
The Alliance Admiral opposing the Empire in this area has been tasked with conducting a campaign into this sector to foment Rebellion, gather allies, and ultimately wrest it from the control of a failing state. He, however, also does not have the deepest pool of resources to draw from and must make do with whatever Alliance Regional Command can spare for his efforts.
The map is a simple hex grid with a few dozen star systems, most of them unimportant. The light blue lines represent fast hyperlanes while the dark blue represent slower hyperlanes. The multitude of alternate routes between systems are not represented, instead abstracted by allowing starships to move about freely but at a significant speed disadvantage when not using the primary hyperlanes. The capital of the sector is the Indupar system which contains noteworthy defenses and a shipyard capable of conducting repairs on starships as large as Star Destroyer sized.
Campaign Start
At the beginning of the campaign the Imperial player was required to distribute their limited assets around the sector not knowing from where the Rebel attack would come nor where their supply lines would originate. Additionally, the primary mechanic at work for the Imperial player was the loyalty of the systems. Each system has its current loyalty and value to the sector tracked. Maintaining assets in any given system will provide a temporary boost to the system's loyalty as well as a possible permanent increase. The actions of both players can also affect individual system loyalty such as military victories, propaganda efforts, ongoing revolts in other systems, and other esoteric actions that the players are free to brainstorm. As the game master, I reward creativity.
The primary victory mechanic is the total system control. Each system's value is multiplied by the system's loyalty, always between 0 and 1. The total of all these values gives a percentage control of the sector. If the sector control lowers too far the Grand Moff will cut off all supply entirely and the campaign is effectively lost. However, the higher the control is, the greater the quantity and quality of the reinforcements Admiral Risser will receive. It is important to note that the Rebel player cannot see the details of these values and must therefore infer them from events and his opponent's actions.
The campaign began with both players maneuvering about the map and probing each other with Probe Droids and starfighter patrols. Within the first few turns the first battle occurred.
The 1st Battle of Omicron-Ceti
The first major action between the two sides occurred in the Omicron-Ceti system, a mining colony specializing in the extraction of Tibanna Gas from the system's gas giants. A small Rebel group consisting of four Marauder Class Corvettes had entered the system and made contact with a resistance cell on the ground. They quickly utilized their on-board starfighter squadrons to assist the cell in openly revolting against the Imperial authorities. This revolt continued for ~ 1 day until Imperial starships arrived.

Exiting hyperspace at about 200,000km from the main planet, the HIMS Dominus, an Immobilizer Class Heavy Cruiser, sailed in system. Escorting the Dominus was the HIMS Flame of Vengeance, a Lancer Class Frigate. The Dominus had also pre-launched her embarked XG-1 Star Wings and ATR-6 Assault Transports. Moments after entering the system the Dominus activated her gravity well generators.

The four Alliance ships, the ANS Baleful, Lucky, Republican Dream, and Last Hope, were in low orbit of Omicron-Ceti Prime supporting the revolt with precision starfighter strikes against ground targets. This was an inopportune time to be engaged in space combat.

As the Dominus screamed into the system trying to keep the enemy ships inside her interdiction field, she began launching her TIE squadrons. Unfortunately, she only carried a squadron of TIE/Ln Fighters and a squadron of TIE/In Interceptors.

The four Alliance Marauder Corvettes recalled their squadrons from the surface and began accelerating out of orbit hoping to round the planet and use it as a shield. All four squadrons of Rebel fighters were T-65 X-Wings.

As the range closed it became apparent that one ship was not with the rest. The ANS Balefull had turned the opposite way from the rest. Was this a distraction, an attempt at a blocking force?

Rather than turn her guns on the errant corvette, the Dominus chose to launch her squadrons to engage the lone ship. The Rebels, having landed one of their X-Wing squadrons to reload on ordinance, had three squadrons of X-Wings to block this maneuver, one of which was loaded with concussion missiles. The ensuing combat saw all three X-Wings fall to a combination of missiles fired from the assault gunboats and the following dogfight with the TIE Fighters and Interceptors. In response the TIE Interceptors were destroyed and the XG-1s took a beating. This left the Balefull open and the ATR-6s took the opportunity to land their stormtroopers onto the ship. One captured ship, many prisoners to interrogate.

Meanwhile the Dominus chased after the fleeing Rebel ships and concentrated her firepower on the ANS Lucky, destroying her.

As the chase continued, the Republican Dream and Last Hope managed to get behind the planet, blocking all fire. The Dominus recalled her gunboats and transports for rearm and reload.

Unfortunately, the Dominus still had a temporary speed advantage, even if she couldn't accelerate as fast. She rounded the planet enough to get her starboard batteries in line of sight to the fleeing Rebel ships. Long range fire hit the Republican Dream and caused light damage. Critically, both corvettes had overtaxed their engines trying to flee the much bigger Dominus and the Republican Dream had blown out one of her engines cutting into her future acceleration significantly.

But the maneuver the corvettes had performed worked and they started to open the distance. In one last attempt to hurt the Rebels, the Dominus launched her ATR-6s again, reloaded with fresh stormtroopers. Unfortunately, the X-Wing squadron the corvettes had been hiding in their hanger bays also relaunched with concussion missiles loaded. The ensuing fight was no contest and the X-Wings trashed the incoming transports. Soon after the two remaining Rebel ships sailed out of range of the Dominus' interdiction field and fled into hyperspace.
The HIMS Dominus had wrested control of the system back from the Rebels, destroyed one corvette and captured another. The Imperials immediately established orbital control and began interrogating their prisoners. There was just the problem of the ongoing revolt on the planet and the Dominus had just lost her assault shuttles and much of her stormtrooper compliment.
The campaign continued from here and more battles followed. The next post will detail the days following the 1st Battle of Omicron-Ceti, a name which should indicate future events.
Part 2
Welcome back; the Ado Sector Campaign continues to rage as the forces of the failing Galactic Empire desperately try to halt the efforts of the Rebel Alliance to foment disorder. After the 1st Battle of Omicron-Ceti, the two forces continued to jockey for position, the Rebels poking and prodding at Imperial systems across the western half of the sector.

In the Tylaq system, Rebel marines from the ANS Paragon performed a daring raid on a mining settlement and liberated 500 Twi'lek slaves, dealing a morale hit to the Empire and winning a crucial propaganda victory. Before the Paragon could rescue more helpless Twi'leks, it and its escorts were forced to flee the system in the face of superior Imperial naval strength.
Rebel ships traveled to the Killisu system and made contact with the remnant of a pirate group hiding there. These pirates once prowled the depths of the Starforge nebula before being nearly destroyed by the Empire. Negotiations to join forces proceeded quickly with the Rebel forces searching the abandoned orbital infrastructure in the system for any material that might be useful. Unfortunately, before this tentative alliance could bear fruit, the Rebel fleet in system was forced to withdraw due to Imperial starships entering the system. The Rebel fleet would later return to Killisu to discover a horrible truth.
In the south-central area of the sector, Rebel squadrons played a game of cat and mouse with their Imperial opposition. Rebel starfighters and corvettes scouted out the Imperial systems looking for weaknesses or potential allies while the Empire scoured space with probe droids, bouncing their heavy ships from system to system as the Rebels revealed themselves. It all felt like a space-borne game of whack-a-mole. Until Vanda.
The Vanda Massacre
Having danced with the Rebel fleet in the proceeding week to great frustration, Admiral Risser devised a plan to pin the elusive Rebel forces. The target he most desired was the sole Rebel capital ship thus far observed in the campaign, a Dauntless Class Star Destroyer.
In the Vanda system, the HIMS Adamant, an Imperial Class Star Destroyer Mk II with its accompanying Lancer Class Frigate, patrolled the system. Suddenly the sensor screens lit up with a hyperspace emergence, two Rebel ships had just entered the system, though fairly far out. The ANS Savior of Ryloth, Dauntless Class Star Destroyer, and Freedom's Grasp, CC-7700/E Class Cruiser, saw the hulking Star Destroyer and turned tail and ran.

The Rebel ships performed a micro hyper jump outside the system with the intention of then re-orienting and jumping again to shake any pursuers. However, this was what the Imperials wanted. Lying in wait outside the system was a group a Imperial starships. Given a vector by the Adamant, this group of ships pounced on the fleeing Rebel ships. The HIMS Apocalypse, Dreadnought Heavy Cruiser, HIMS Fury's Depth, Ton-Falk Class Cruiser, and HIMS Praetor, Nebulon-B Class Frigate, had caught the heavy Rebel ships. The Savior of Ryloth could have jumped away but after a quick analysis of the firepower differential saw this as an easy way to dispatch some medium Imperial vessels. The battle was on.

The ANS Freedom's Grasp immediately activated her interdiction field to prevent the Imperials from escaping and the two ships began to turn to starboard to bring the preponderance of their weapons on to target. The Fury's Depth turned away from the Rebel ships, its limited firepower not needed in this fight, and its starfighter compliment would still be well in range. The Apocalypse charged at the Savior of Ryloth firing all its medium turbolasers at the Freedom's Grasp as it sailed in. This move was intended to make the ship appear as a bigger threat than it was.
It worked. Every weapon in arc on the two Rebel ships tore into the Dreadnought first bringing down its shields and then tearing through the forward hull. The ships were at very close range making the heavy turbolasers on the Savior of Ryloth that much more potent. In short order the Apocalypse had lost most of her forward section.
In Metaverse 2.0 there is a mechanic called Threat. Every starship design has a threat rating derived from its weapons, EW capabilities, maneuverability, and power consumption. This threat is multiplied by an enemy starship's Crew Discipline (expressed as 5,10, or 15cm) to determine the Danger Close range for that starship. When a ship is considered Danger Close, every weapon capable of firing on the target must fire on the target, regardless of the wishes of the player. This can be used to great effect with escorts and screening vessels or in this case with a mad Dreadnought captain trying to keep the enemy turbolasers off an escort carrier.

As the starships passed by each other, the Savior of Ryloth found that her forward guns were now clear to engage the escort carrier. Ion cannons and turbolasers lashed out forward at the Fury's Depth and rearward at the Apocalypse. It did not take long until the Apocalypse drifted as a burned out hulk. The Freedom's Grasp did not come out unscathed, however, as the Dreadnought fought until her last moment pouring medium and light turbolasers at point-blank range into her shields.

The battle was far from over, however, as the Rebel starfighter group flew to the Fury's Depth intent on taking advantage of her depleted shields. Two squadrons of Z-95 Headhunters escorted two squadrons of B-Wings laden with Plasma Torpedoes. Curiously, the lonely escort carrier launched all her starfighters at the Rebel starships. A squadron of TIE/Sa bombers loaded with proton torpedoes directed by a flight of TIE/Sr Scouts were escorted in by two squadrons of TIE/In Interceptors, a squadron of TIE/Ln Fighters, and a squadron of XG-1 Assault Gunboats. The Praetor launched her own bombers with escorts as well. The Rebel fighters decimated the defenseless escort carrier. In return the Imperial fighters loosed proton torpedoes into the Freedom's Grasp causing widespread damage and system failures, including her hyperdrive, though not without losses. The Rebels seemed content with this outcome as their starfighters utterly destroyed the Fury's Depth leaving a lone Nebulon-B to fight the Rebels and they had all the time in the world to repair the interdictor cruiser.

That's when the other shoe dropped. The Imperial squadron engaging the Rebels was only meant as a blocking force to give enough time for the HIMS Adamant to reacquire them. In a flash of radiation the Imperial Star Destroyer emerged from hyperspace at the edge of the Freedom's Grasp's interdiction field. Surrounding her was a cloud of hyper capable craft including TIE/Sr Scouts, XG-1 Assault Gunboats, Lambda Shuttles, ATR-6 Assault Shuttles, Delta DX-9 Assault Shuttles, and Gozanti Gunships.

Faced with a giant triangle of death, the Savior of Ryloth made the only decision it could, it ordered the Freedom's Grasp to deactivate her interdiction field and abandoned her to the Imperials. In short order the Empire boarded the cruiser and took the crew prisoner.
This battle was hard to quantify in terms of victor. The Imperials lost a heavy cruiser and an escort carrier but took out a strategic level asset of the Rebel fleet. Both sides felt like they had won and lost.
The 2nd Battle of Omicron-Ceti
So far in the campaign, the Omicron-Ceti system had been the center of much activity. The Rebellion had fomented revolt on the planet, a revolt that was still raging, and the 1st battle of Omicron-Ceti had been a decisive victory for the Empire. Since then efforts had been made to stamp out the resistance on the primary planet with many insurgent leaders killed. Then conflict came again to this frontier system.

The HIMS Kingmaker, a Strike Class Cruiser, had been assisting the local garrison of Omicron-Ceti Prime in stamping out the ongoing revolt to great success. In a moment her situation changed. Emerging from hyperspace as close to the planet as possible, a Rebel fleet stood to force the Imperials out. The ANS Paragon, an Assault Class Heavy Cruiser led a force consisting of a CC-9600 Frigate, Nebulon-B Frigate, Marauder Corvette, two Braha'tok Corvettes, and two Hammerhead Corvettes. The Kingmaker had at her disposal a Bayonet Frigate and a Tartan Frigate. The force disparity seemed one sided but the Captain of the Kingmaker believed he could leverage his position and cause serious losses on the Rebels so chose to stay and fight.

Fortunately for the Imperials, the Rebel fleet exited hyperspace on the opposite side of Omicron-Ceti Prime granting some tactical options. Unfortunately, being in low orbit, the Kingmaker would begin the battle with a speed disadvantage.

The Kingmaker immediately made a turn to port and accelerated out of orbit in the hope of staying in the shadow of the planet for a while longer. This would give time to get the ship up to speed. Meanwhile, the HIMS General Krill, Bayonet Class Frigate, accelerated to the Kingmaker's starboard in an attempt to cover that flank from the Rebel corvette group. The Rebel fleet accelerated in system.

As the distance closed, the Rebel commander had to choose to round the planet with the Paragon, his most powerful ship, in one direction or the other. Correctly predicting which side the Paragon would go, the Kingmaker turned the other way to face the frigate group. The General Krill continued to accelerate hard to the other side of the battlespace maintaining long range to the corvettes, her heavy turbolasers giving a range advantage. The Kingmaker loosed fire at the Tyrant's Bane, CC-9600 Class Frigate, but only tickled her shields at this range.

Hoping to keep the range to her advantage, the Kingmaker turned to starboard as the Rebel frigate group's medium turbolaser armament was lacking in comparison to the Strike Cruiser. The Paragon passed by the planet at a very close distance, her shields flaring due to atmospheric friction.

However, things began to turn for the Imperials. All on her own, the General Krill was now the target of a boarding attempt. Two flights of Delta DX-9s carrying Rebel marines, escorted by JV-7 shuttles angled at the Bayonet Frigate. Moving to intercept, a squadron of TIE/In Interceptors and a squadron of TIE/Ln Fighters were joined by a VT-49 Decimator gunboat. They gave a good accounting of themselves but a few shuttles got through and deposited their cargo onto the little frigate. The General Krill was no longer in Imperial hands.

Adding insult to injury, the Rebel reserve force now entered the fray. Waiting for the call, the ANS Smuggler, a Liberator Class Heavy Cruiser, was waiting outside the oort cloud for the right moment to strike. She brought with her a Quasar Fire Cruiser, MC40 Cruiser, MC30 Cruiser, and two CR90 Corvettes. The force disparity just got much worse.

In quick order the starfighter compliment of the reserves streaked to the Kingmaker. A-Wings, Y-Wings, X-Wings, Z-95 Headhunters, and R-41 Starchasers went in for the kill. The TIEs that returned from the General Krill were not enough to stop this onslaught. Proton torpedoes and proton bombs smashed into the Kingmaker until its hull buckled and its atmosphere escaped; the strike cruiser was no more.

But the Kingmaker did not go down without a fight. As the Rebel starfighters strafed her hull and tore great holes in her structure, her turbolasers and ion cannons ripped into the Tyrant's Bane until her reactor gave out and she disappeared in a flash. The hypermatter explosion from this frigate took out her escorts, a Nebulon-B Frigate and a Marauder Corvette. The Marauder was a veteran of the 1st Battle of Omicron-Ceti; only fitting that she meet her demise in the 2nd. Shortly after the remaining Imperial Tartan Frigate jumped out of the battle leaving the remaining TIEs to be destroyed.
The 2nd Battle of Omicron-Ceti was a Rebel victory though not without its costs. The Ado Sector Campaign continues.
Part 3
Welcome back; the Ado Sector Campaign continues with no end to the troubles for the Galactic Empire in sight. After the 2nd Battle of Omicron-Ceti the two forces seemed to take a step back from each other. Like two punch-drunk boxers, the Rebel Alliance and the Galactic Empire needed a moment to recover from their respective losses and review their plans.

The Rebel ships continued their scouting of Imperial systems, running when encountering Imperial vessels, broadcasting propaganda and news of Imperial atrocities when not. This campaign to win the hearts and minds of the sector's populace came to a head when a Rebel squadron revisited the Killisu system, a place they had visited before in an attempt to forge an alliance with the pirate group based there. Upon arriving in orbit of the inhabited planet, the Rebels discovered a horrible truth. It appeared the planet had been subject to a Base Delta Zero, the complete destruction of the planetary surface through orbital bombardment. The Imperials hadn't landed ground forces to arrest the criminals based there, they simply exterminated them from orbit. The Imperials even went as far as destroying or de-orbiting all the orbital infrastructure, leaving nothing for the Rebels to use. Apparently, there were no depths the Imperials wouldn't stoop to.
Days later the Rebel commander devised a devious plan. A small squadron of corvettes made their way to Lauper's World, a privately owned system designed as a retreat for members of the Kuat Drive Yards Corporation. Upon entry to the system, the Rebel ships chased down as many of the luxury yachts and pleasure craft as possible and forced them to land on the planet. Once evacuated, the corvettes destroyed the craft from orbit and then began targeting any vacant villas and entertainment centers. Meanwhile, several corvettes targeted the primary ocean with a limited bombardment, vaporizing millions of tons of ocean water and filling the skies with precipitation. In only a few days the world would experience cloud filled skies and wet weather like this vacation world had never seen. Satisfied that their work was done the corvettes made a hasty retreat.
This odd endeavor seemed to have worked as shortly afterword, Admiral Risser received a transmission from the legal department of Kuat Drive Yards indicating imminent legal action. A transmission that was also sent to the Grand Moff. The ramifications of this little excursion are still being felt.
After quite a few quiet days interspersed with shenanigans like Lauper's World, a major battle took place.
Assault on Lachindra Station
The Lachindra system is home to an Imperial supply base, orbital control platform, and small dockyard capable of servicing up to frigate sized vessles. After limited scouting, the Rebels decided on a plan to assault this important system.

High above Lachindra Prime sat the dockyards, a forward repair base intended to service light Imperial warships. Critically, the system housed a supply depot on the planet's surface that provided munitions to the Imperial fleet in the area.

Lachindra Prime was orbited by an XQ4 Class Space Platform providing orbital control. (I have a model for this station on its way from Shapeways but it hadn't arrived in time for the battle so a substitute was used) This platform featured a limited turbolaser armament and several squadrons of TIEs. Assigned to the station was a squadron of IPV-1 Patrol Craft that could be found patrolling the local space.

In an instant, the normal day for this Imperial garrison got more complicated. Exiting hyperspace as close to the planet's gravity well as they dared, a Dauntless Class Star Destroyer and a Liberator Class Heavy Cruiser disturbed the sleepy Imperials. Their starfighter compliments arrived with them; Z-95s, B-Wings, A-Wings, and Y-Wings stood ready to deliver freedom.

Immediately the platform began launching its starfighters, as outnumbered as they would be. The IPV-1s began to form up, tiny gnats in comparison to the huge Rebel ships. This encounter felt like a reverse of the past years of the Rebellion.

The IPV-1s charged at the leviathans in a desperate attempt to give the platform time to organize its defenses. Between the fleets, civilian transports and freighters accelerated to get out of the way.

In a Hail-Mary maneuver, the station launched its assault shuttles loaded with proton torpedoes at the Liberator escorted by a single squadron of TIE/In Interceptors. Facing off against this were two squadrons of A-Wings, two squadrons of Z-95s, and two squadrons of Y-Wings.

This desperate attempt ended mostly in failure. The TIE Interceptors were destroyed taking an A-Wing squadron with them. The ATR-6s were eventually destroyed by the massed Rebel fighters but did manage to get off a few torpedoes which did light damage to the Liberator. As this happened, the Dauntless fired her entire compliment of turbolasers at the station and vaporized it in short order. The Liberator targeted the IPV-1s and they soon joined the station in death.
Upon seizing control of the orbitals, the Rebel commander called in a group of transports that had been waiting at the edge of the system. These transports carried a battalion of Rebel troops which immediately assaulted the ground facility, killing or capturing the Imperial occupants and generally wrecking the place. When Imperial starships returned to this system they discovered wreckage in orbit and a wrecked and empty ground facility.
1st Battle of Tylaq
Ever since the Rebels had performed a daring raid on the Tylaq system and freed many Twi'lek slaves, they promised to return and finish the job. A few days after the assault on Lachindra station the Rebels made good on that promise.

Dropping out of hyperspace, a group of Rebel starships surprised the few Imperial vessels near Tylaq Prime at its parent gas giant. An Assault Class Heavy Cruiser, MC40 Class Cruiser, MC30 Class Cruiser, CR90 Class Corvette, and a Bayonet Class Frigate presented a strong force. The Bayonet was the HIMS General Krill, captured in the 2nd Battle of Omicron-Ceti, re-crewed and now serving the Alliance.

Facing this fleet was a lone Nebulon-B Frigate and four CR90 Class Corvettes. The firepower disparity was too great and the only choice obvious, retreat.

The CR90s immediately turned away from the Rebels and accelerated with every thing they had. Noticeably slower than the little blockade runners, the Nebulon-B made for the gas giant. She also launched her TIE/Sa Bombers alongside her TIE/Ln Fighters.

The Rebel fleet accelerated into the planetary system and began firing at long range at the fleeing Imperial ships. At this range the fire did little more than tickle the Imperials, though the Nebulon-B's rear shields did drop and some scoring on the hull was felt.

As the Rebel fleet pushed closer to the Imperial frigate, she decided to launch a spoiling attack using her starfighter squadrons. The bombers, loaded with proton torpedoes, were escorted by the fighter squadron into the MC30, the closest ship to the Nebulon-B. The only squadron with the Rebel fleet were A-Wings from the MC40. The TIE/Ln Fighters engaged the A-Wings in a furball, resulting in mutual destruction, while the bombers loosed their torpedoes on the MC30. These torpedoes tore into the ship rending holes straight through her hull and knocking out systems across half the ship. The spoiling attack seemed to have worked.

As the Nebulon-B accelerated around the gas giant, the Rebel fleet split to encircle the ball of hydrogen hoping to cut off escape routes. The Rebels knew they were faster than the Imperial frigate but the gas giant could give it the time to get enough distance to enter hyperspace.

The MC30, venting atmosphere turned away from the group to lick her wounds.

At this point it became obvious that the CR90s would likely make their escape leaving the Nebulon-B as the prime target for the Rebels.

But the Nebulon-B managed to hug close to the upper atmosphere of the gas giant and avoided enemy fire for a little while longer, but the Rebels were gaining.

Unfortunately, while the Assault Cruiser had been avoided for now, it appeared that in mere moments the MC40 would come round the other side of the planet and finish the frigate.

Orbital mechanics were played out and the Assault Cruiser remained blocked from the frigate along with her attendant CR90 and Bayonet Frigate.

But in a surprising and perhaps brilliant move the Nebulon-B had not attempted to avoid the MC40, rather she turned into her accelerating all the way and she was not alone. Two of the CR90s had performed a crazy turning maneuver placing themselves between the frigate and the cruiser. Finally, the Nebulon-B launched her reloaded bombers at the Rebel cruiser on a suicide mission. At this range the MC40s light turbolasers would spell the end of the frigate but with a TIE/Sa Bomber squadron bearing down on it, the cruiser would likely defend itself first. In the ensuing firefight, the cruiser's shields were damaged, the bombers destroyed, and the Nebulon-B received significant damage but remained whole.

This maneuver had slingshot-ed the Nebulon-B out past the MC40 and left the Assault Cruiser well behind. In another few moments she was clear of the gas giant's gravity well and entered hyperspace along with all four CR90s.
The 1st Battle of Tylaq should not have been an interesting game but the brilliance and heroics of the Imperial squadron made it so. The Rebels had captured Tylaq and caused some damage to the Imperial vessel but paid the price of significant damage to one of their cruisers.
The Ado Sector Campaign continues.
Part 4
The Ado Sector Campaign continues. A small lull has occurred since the 1st Battle of Tylaq.

The Imperials have made no aggressive moves towards the Rebels, not that they have had much opportunity, the campaign feeling more like a game of cat and mouse than a pitched battle. For their part the Rebels have not pursued any serious objectives outside their constant propaganda broadcasts into unoccupied Imperial systems and their campaign in the Tylaq system. This calm was disrupted by a new battle.
The 2nd Battle of Tylaq
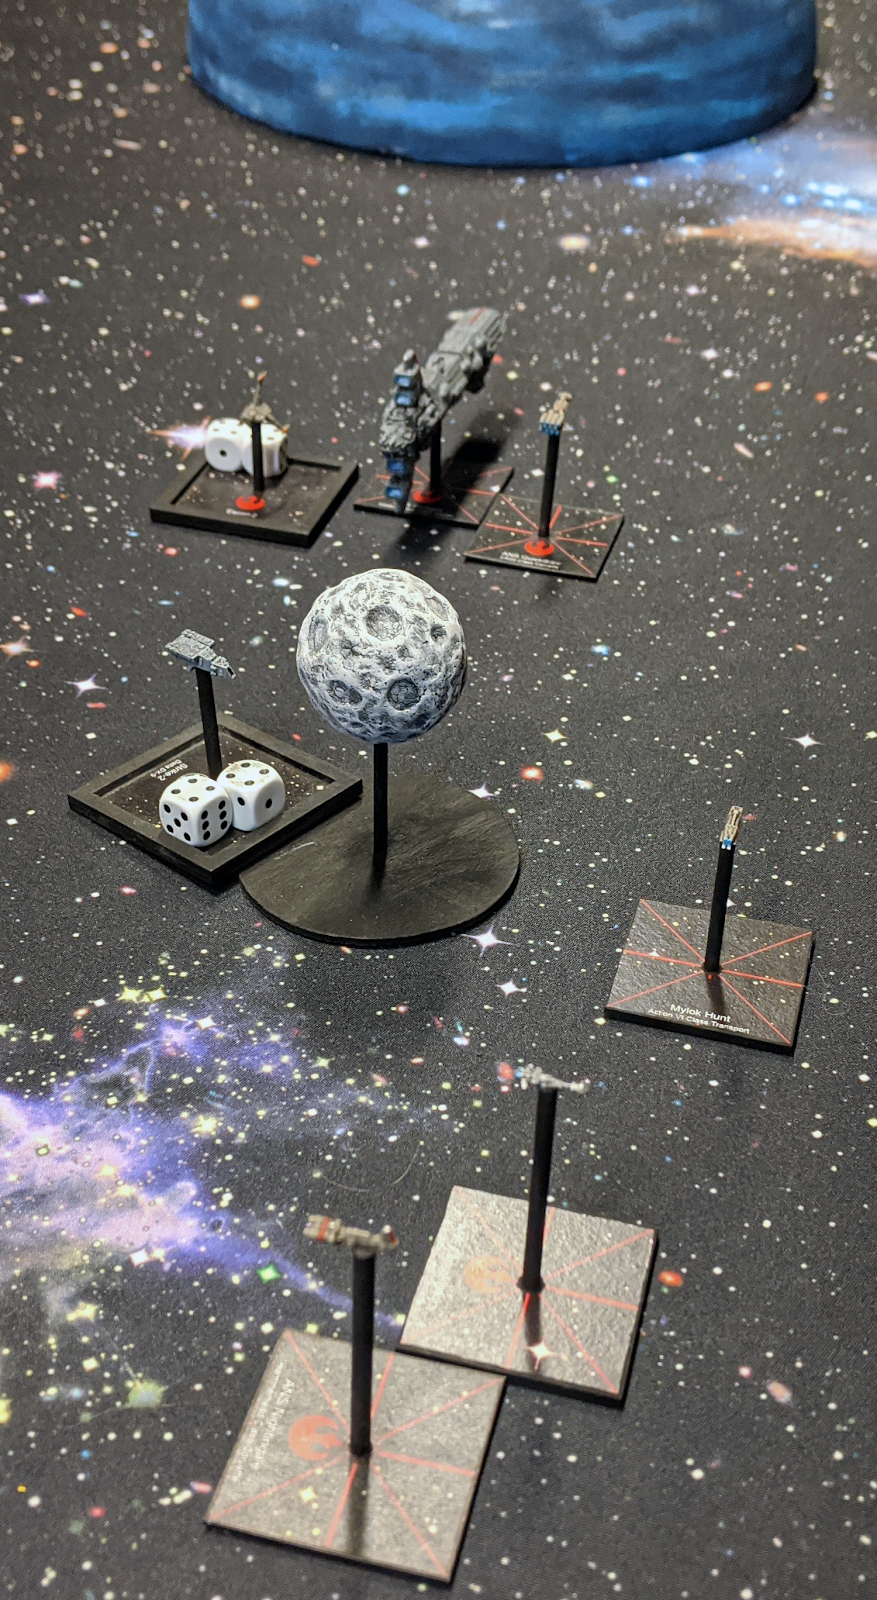
After having successfully driven off the Imperial forces in the Tylaq system, the Rebel fleet under the ANS Paragon began a campaign of liberation. A Rebel ground force was landed on Tylaq Prime that proceeded to free thousands of Twi'lek slaves from the work camps. Several GR-75 Medium Transports were landed on the planet to offload the Rebel troops while an Action VI Transport orbited the world receiving refugees lifted into orbit by the assault shuttles from the ANS Paragon. All was going well with the operation for a few days.

The ANS Paragon, an Assault Class Heavy Cruiser, maintained a high orbit of Tylaq Prime lending the assistance of its Delta DX-9 assault shuttles and JV-7 escort shuttles to the ground effort. A CR90, Braha'tok, and Hammerhead corvette all assisted to form a security cordon.

In a flash the operation was disrupted by the arrival of an Imperial task force. The HIMS Crimson Death, a Carrack Class Cruiser Mk II, led a fleet of starships including a Nebulon-B Frigate, Lancer Frigate, Arquitens Frigate, four CR90 Corvettes, four DP20 Corvettes, and two Raider Corvettes. This fleet topped out at a cruiser and faced a heavy cruiser but the shear number of ships and turbolasers was worrying.

The Imperial fleet immediately accelerated hard towards the gas giant system, it's gravity well having pulled them from hyperspace outside weapons range of the Rebel starships. The Nebulon-B began launching its TIEs, starting with bombers.
With boots on the ground of Tylaq Prime, transports landed, and a transport half filled with refugees in orbit, the Rebel commander could not abandon the planet. The Assault Cruiser turned into the Imperial fleet and the escorting corvettes raced to join the big ship.

As the range closed the number of Imperial ships began to worry the Rebel commander, even if the mass differential told a different story. The Imperial fleet had picked up so much speed that the closing rate was very high. The Rebel commander wondered if the Imperials were hoping to simply fly right past his fleet. What did they know?

At the close range between the ships, the lighter turbolasers on the corvettes were at optimal distance. The Assault Cruiser's forward shield took impact after impact glowing brightly and then finally collapsing. The DP20 corvettes, easily the best small ships in the battle, raked the forward hull of the heavy cruiser until the structural integrity of the bow of the ship collapsed entirely leaving a trail of debris and bodies behind it. In response the ANS Paragon, with the assistance of her JV-7s utterly annihilated one of the deadly corvettes.

Ignoring the escort shuttles, the starfighters from the Nebulon-B vectored on the Braha'tok Class Corvette with its Hammerhead escort. Thinking that these tiny ships could put up no real resistance, the CAG flew in arrogantly. However, the Imperials were unfamiliar with this little ship and its eight concussion missile tubes and many light turbolaser cannons. Both squadrons of TIEs were eliminated before entering weapons range.

As the Assault Cruiser turned to starboard in an attempt to shield its wrecked front end, the Imperial fleet made a 135 degree turn to port, away from the Rebel fleet. In that moment a massive snap occurred and a Dauntless Class Star Destroyer emerged from hyperspace surrounded by a veritable cloud of starfighters. X-Wings, A-Wings, Y-Wings, Z-95s, and B-Wings formed a massive strike group. The Dauntless had been sitting just outside the system in reserve waiting to be called in for just such a situation. The Imperials moved like they knew it was coming but this could have simply been coincidence.

Immediately the Dauntless made its presence known. Dozens of heavy and medium turbolasers and ion cannons tore into the reduced squadron of DP20s. In short order all three fell to the preponderance of firepower coming from their rear.

The starfighters around the Dauntless were quickly dispatched to high value targets. Y-Wings loaded with proton bombs chased after the Arquitens frigate quickly destroying her.

B-Wings loaded with proton rockets sailed to the Nebulon-B, somewhat separated from the rest of the Imperial fleet. In short order the Nebulon-B drifted in two pieces.

But the Imperials were not without their retaliation. The starboard turn of the Assault Cruiser had left her front exposed to the majority of the fleet. Even while losing ships to the massive Dauntless, the Imperial starships continued to pour fire into the damaged bow. Eventually the ANS Paragon broke apart suffering from internal fires and explosions, a victim of a thousand cuts. The remaining Imperial vessels, having reached the edge of the gravity well, entered hyperspace and escaped.
The question of who won this battle is very much undecided. The Imperials lost two frigates and four powerful corvettes but the Rebels lost a heavy cruiser, a nearly irreplaceable asset. It seemed as though the Imperial fleet had been performing a slash and burn attack rather than any real effort to force the Rebels out. If not for the arrival of the Dauntless, the Imperial fleet likely could have destroyed the Rebels and retaken the system. For now the Rebels continue their campaign of liberation in Tylaq.
The Ado Sector Campaign continues.
Part 5
The Ado Sector Campaign continues. After the 2nd Battle of Tylaq a flurry of activity occurred on both sides of the conflict.

The Rebels quickly concluded their operation in the Tylaq system and made a speedy exit with thousands of Twi'lek refugees crammed into transports. The Imperials swiftly moved back into Tylaq and regained control of the system depositing a garrison base on the primary planet, a sizable ground force, and numerous squadrons of TIEs.
Elsewhere, Rebel ships continued to harass outlying systems, broadcasting propaganda into the local HoloNet whenever possible, an effort that was beginning to have an effect on the loyalty of the fringe systems of the sector.
After the Rebel's bold operation at Lauper's World, disrupting the vacations of many Kuat Drive Yards executives, the response to the legal actions of KDY by the Imperials was not subtle. The HIMS Adamant, an Imperial Class Star Destroyer, entered the system, deposited its garrison base, an entire legion of stormtroopers, multiple walker companies, and a wing of TIEs. The local aristocrats were informed that this deployment was to prevent further Rebel incursions into the system. KDY was not pleased citing the private ownership of the system and the actions of the Imperial fleet as a gross violation of sovereignty and revoked all existing contracts.
Shortly afterword, the Imperial Admiral was informed that the Grand Moff had suspended the supply of all spare parts for KDY designed ships to the sector, effectively making it impossible to conduct repairs on any such vessel. Pissing off the largest arms manufacturer in the galaxy was not a good idea.
Then in the course of two days three battles occurred.
The 1st Battle of Silvestri
At the tail end of a minor hyperspace lane, the quiet system of Silvestri was patrolled by a collection of small Imperial starships.

The HIMS Crimson Death, a Carrack Class Cruiser Mk II, led a battlegroup of a Lancer Frigate, four CR90 Corvettes, and two Raider Corvettes. They maintained their visible presence around Silvestri prime, showing the flag and stamping out resistance. With a flash their sensor screens lit up as a Rebel starship exited hyperspace near the Oort cloud of the system; clearly a scout.

The Rebel starship, a Bayonet Class Frigate stolen from the Imperials earlier in the campaign, relayed the positions of the Imperial starships deeper in the system to the rest of its squadron and coordinated a precision jump to Silvestri Prime. The Rebel squadron of a MC40, MC30, and the Bayonet jumped in as close as they dared to the gravity well. Unfortunately, the Imperials noticed the frigate and had maneuvered in the minute it took the Rebels to organize; they weren't where the Rebels wanted them.

The Carrack and her attendant Lancer had sped away to starboard to open the distance and turn the range of the cruiser's heavy turbolasers to it's advantage.

The Imperial corvette squadrons had sped out of the gravity well in an attempt to pincer the Rebels and though not in perfect position, were still sufficiently behind the Rebel ships to avoid most of their firepower.

A few stray shots were exchanged and the two sides maneuvered to try and get the advantage. The three Rebel ships turned to starboard both to bring their broadsides onto the Imperial corvettes and try to close the range to the Carrack, their primary target. The Carrack performed a 135 degree turn to be perpendicular to the Rebels and show her broadside heavy turbolaser batteries. The CR90s and Raiders closed in to harass the MC40 and MC30. At this range the Carrack had difficulty overcoming the shield regeneration of the MC40 but poured out fire anyway.

The Imperial corvettes raked the shields of the MC40 with light turbolasers and light ion cannons achieving more than the Carrack due to the much shorter distance. The Rebels in turn found landing hits on the nimble corvettes frustrating.

The velocity of the Rebel ships was increasing rapidly while the Carrack was burdened with the relatively slow Lancer. Realizing that trying to keep the distance open was a futile endeavor, the commander of the Imperial cruiser did something rash, he turned to starboard and engaged in a broadside with the much larger MC40. At first this seemed like suicide, but this was a Mk II Carrack which replaces its point defence laser cannons with light ion cannons. At point blank range as the ships passed each other, the Carrack managed to drop the starboard shields of the MC40 and land heavy turbolaser hits to the hull. For its efforts, the Carrack had her shields dropped and her hull repeatedly torn open by return fire.
The Imperial corvettes had closed to the rear of the MC30 and Bayonet. Not confident they could deal with the MC30, the six corvettes targeted the Bayonet and destroyed it in short order. It was their ship anyway, the Rebels just stole it.
At this point the Rebel commander made a decision to escape the system. He was confident that he could destroy the Imperial battlegroup but not comfortable with the losses it would take to do it. Silvestri remained in Imperial hands.
The 1st Battle of Vanda
24 hours later one jump away in the Vanda system, the HIMS Crimson Death fought another small action. The Imperial cruiser was leading its damaged battlegroup back to base for repairs and made a stop in the Vanda system only to find Rebels in their way.

Only a few hours earlier, two Rebel corvettes, a Braha'tok and Hammerhead, had entered the system and begun harassing the locals. Immediately turbolasers flew in the direction of the tiny Rebel ships but only a single hit was scored dropping the starboard shields of the Braha'tok.

The Rebel ships instantly burned for everything they were worth, turning away from the Imperial ships in an attempt to get out of the gravity well. The Imperials naturally gave chase and continued to fire at the corvettes but again only managed to drop the rear shields of the Braha'tok.

As the seconds drew on, the Rebel ships reached the edge of the planet's gravity well but the Imperials were hot on their stern. Combined fire from the Carrack and the Raiders finally managed to damage the Braha'tok, destroying it in moments. the CR90s raked the Hammerhead at point blank range tearing it apart. For the moment the Vanda system was quiet.

However, a few hours later as the Imperials performed damage assessments, more Rebels arrived. Entering the system from three directions, six Rebel starships arrived clearly intending to rendezvous with their lost brethren. Two CR90s approached from the port-aft of the Imperial group.

While to the front of the Imperials, a MC30 snapped into realspace, the same MC30 they had just fought the previous day in the Silvestri system. To the port-bow, two Braha'tok corvettes and one Hammerhead also joined the fight. Neither side was expecting this action but the Rebels were disrupted to a greater degree thanks to the separation of their squadrons. Within seconds, weapons fire streamed through the vacuum seeking targets, though with no real damage to show for it.

The Imperials were head-on to two different Rebel squadrons and so it was no surprise when a brawl in space erupted. At nearly spitting distance the Carrack and MC30 threw hate each others way. The Carrack performed the same trick as the last battle and dropped the shields of the Rebel cruiser with light ion cannons and pounded the front of the ship with heavy turbolasers while the corvettes hit on the starboard side. The MC30 was not as successful with its bow mounted proton torpedo launchers all missing their target. This one failure doomed any chance the ship had in this battle. The Rebel corvettes raced to close the distance.

Realizing that the fight was not to their advantage, the Rebels began to move away from the planet to escape into hyperspace. The MC30 activated her hyperdrive to retreat but it blinked a warning error and harmlessly dissipated its charge. The ship had miscalculated and tried to enter hyperspace while still inside the gravity well. She would have to charge the drive for a few more seconds to try again, seconds that could prove deadly. The Imperials gave chase to the most valuable target, the MC30. Again turbolasers crossed the void and rendered serious damage to the Rebel cruiser. As the Braha'tok corvettes passed by the port-aft of the Carrack, it loosed its other broadside into them with lucky shots managing to hit one of the elusive ships destroying it utterly.

As the MC30 continued to pour on the speed overtaxing her engines, the Rebel corvettes made their own retreat into hyperspace. The Imperials continued to chase the cruiser trying to down it before it left but the range was opening. More damage was inflicted but none of it crippling.

As the seconds counted down to it's retreat, the MC30 made a hard turn to starboard, a move the Imperials did not predict, and further opened the range. A few shots from the Carrack impacted the rear shields and then with a flash the MC30 jumped.
This was the third battle for the HIMS Crimson Death and her battlegroup in less than a week. Many of the ships had battle damage and were in desperate need of repair but they had successfully maneuvered their way through each encounter. The Imperials bestowed a commendation to the captain.
The 3rd Battle of Tylaq
It seemed as if the Tylaq system, a lonely mining colony, had become the focus of this entire campaign. Rebel ships had annoyed the local garrison for weeks before finally an invasion force descended and liberated the slave camps. Two major battles had already been conducted there over the proceeding days before the Rebels finished their operation and left. In response, the Imperials dispatched a Victory Class Star Destroyer to regain control of the system. With well placed intelligence agents, the Rebels new of this deployment and sent their flagship, the ANS Savior of Ryloth, a Dauntless Class Star Destroyer, to hunt the Imperial whale.

The ANS Savior of Ryloth jumped into the all too familiar Tylaq system, surrounded by a cloud of starfighters from its own bays and those of an escort carrier outside the system as well as a CR90 and Marauder corvette, expecting to find their prey.

But their intended target had left. In its place an Imperial squadron was slowly orbiting the gas giant. A Ton-Falk Escort Carrier, Carrack Cruiser, Tartan Frigate, and Arquitens Frigate seemed like a juicy target.

However, moments after arrival, the snap of more Imperial ships exiting hyperspace changed the equation. 120 degrees off from the Dauntless, a Vindicator Heavy Cruiser, Immobilizer Heavy Cruiser, and a Raider Corvette joined the squadron already in system. The Immobilizer seriously complicated the situation as it would prevent the Dauntless from simply leaving. A battle was now inevitable. Curiously, these ships had a TIE variant on escort that the Rebels had not seen the entire campaign, TIE/Ad Avengers. Where did they come from?

In response to the interlopers, the Imperial heavy cruisers made to fall into the shadow of the gas giant to give themselves time to organize. TIEs began to leave the ships in ever increasing numbers.

The Dauntless and her group accelerated and turned to port to round the planet. She then dispatched her starfighters to disrupt the Imperial movements.

The smaller Imperial ships turned and accelerated for the perceived safety of the other ships. The escort carrier dumped TIEs into the vacuum.

Tylaq Prime also contributed to the Imperial fleet in the form of starfighters launched from the surface. The planet became a staging ground as all forms of craft from the ships joined up with the garrison in a holding pattern.

It was at that moment that the Rebel starfighter strike descended on the Imperials, when much of their force was at Tylaq Prime. A-Wings, Z-95s, Y-Wings, X-Wings, JV-7s, and Delta DX-9s struck out for the escort carrier. All that was left to oppose this mass were two squadrons of TIE/In Interceptors and two squadrons of TIE/Ad Avengers. The ensuing release of concussion missiles and subsequent furball saw most of the Imperial starfighters destroyed and the Rebel bombing missions successful. Plasma and ion torpedoes slammed into the starboard side of the escort carrier until the entire right side of the ships was a charred wreck.

With the Imperials put on notice, the Dauntless performed a fake out and turned back to starboard trying to get its array of heavy weapons into the fight. Overtaxing her engines, the Dauntless massively increased her speed but blew out all three aft engines in the process.

As the Rebel starfighter mission returned to the Dauntless for reload the Imperial ships continued to close with each other and put more TIEs into space. They had zero interest in engaging in a long range gunnery duel with the Rebel capital ship.

All of those starfighters continued to coalesce over the planet in what could be accurately described as a death blobTM.

With the gas giant still blocking all weapons fire, the Imperials endeavored to keep it that way moving ever closer to the ball of hydrogen. The maneuvering barely succeeded with the Dauntless blocked from engaging them for a few more precious seconds.

It was at that moment that the Imperial commander judged the time was right. It was unlikely that the fleet would get another turn in the shadow of the gas giant and the starfighter Death BlobTM was of sufficient size. TIE fighters, interceptors, bombers, avengers, scouts, XG-1s, and ATR-6s crashed into the Rebel capital ship like a tsunami. The few opposing starfighters that hadn't been landed to reload were not sufficient to stop the horde. Waves of proton torpedoes impacted the Dauntless and though the PDS of the massive ship stopped a few, the rest were more than sufficient. The mighty Rebel ship was torn in half. The Dauntless was not only the most powerful Rebel ship in the sector it was also the Admiral's flagship. It spelled the end of the campaign. Almost as an after thought, the two escorting corvettes were boarded and captured.
In the sudden action of a starfighter strike, the campaign was over. The Rebel fleet had only one remaining command ship in the entire sector and taken serious losses over the last few turns, there was no coming back.
I would like to thank Will and Matt for an enjoyable experience watching the both of you navigate the map like blind drunk boxers. We managed to prosecute 26 turns in this campaign and fight 9 noteworthy battles. Many more encounters occurred where the Rebels fled at the sight of the Imperials; typical slippery Rebels.


Comments
Post a Comment