Archanis Campaign [Star Trek]

The Archanis Campaign was conducted from April to May 2020 amidst the COVID-19 Pandemic.


Part 1

Good morning readers. The Ado Sector Campaign I ran recently came to a close with an explosive ending putting a stop on the Star Wars fun. Not wanting to sit idle, I put together a Star Trek campaign and invited a different group of friends to participate, as much to spread around the fun as to see different personalities at play.

Both my and my friend Adam's Star Trek collections are geared towards the Dominion War with a host of modern ships, though not without a horde of older designs. However, I did not want to do the Dominion War proper as it is both a much more complicated environment than I want to tackle at the moment and I have a plan to run such a campaign when we are able to once again be in each other's presence.

Instead I chose to model the Federation-Klingon conflict over the Archanis sector in 2372-2373. For any unfamiliar with this conflict, this Memory Alpha article should get you up to speed. This conflict is much easier to model as it is a more contained space, has only two sides, and lasted just six months. This also had the benefit of utilizing two of our more extensive collections, Starfleet and the KDF.

Drawing on the experiences of the Ado Sector Campaign recently concluded, I devised a new set of rules to govern play. Certain elements of the previous campaign proved to be clunky or often inadequate for the imaginations/machinations of the players. Also, Star Trek is a very different environment than Star Wars.

I have always held to the idea that Star Wars is a much more complex tactical environment with many interacting pieces, much like naval warfare in the pacific theater of WWII. Star Trek by comparison, while my preference in terms of narrative fiction, is relatively simple tactically, resembling aerial combat. Developing this campaign I realized that it isn't that simple. While Star Wars offers a complex tactical environment, operationally and strategically it is less so. Combat in Star Trek is, by comparison, very simple, but strategically it is much more detailed than Star Wars.

This came about as I was grappling with modelling starships with real-time FTL sensors that reach out much beyond their movement ranges in a reasonable time frame that function even while travelling at warp. This creates a witches-brew of action-reaction-counter action as starships can see each other as they are moving across great distances and can intercept and flee from each other. Breaking the campaign down into turns of discrete time does little to alleviate the headache. And I haven't even mentioned combat while at warp. Star Wars, you just jump point to point and fight.

But I managed to do it, at least sort of.


All the relevant models for the campaign from both Adam's and my collections.


The map of the campaign showing a 60x60 light year area around the Federation-Klingon border. In its normal format this image is quite large, built with hundreds of layers in Photoshop, so large I couldn't post it on the blog. Apologies for the lower quality image.


The Campaign

The Archanis Campaign is a map game whereby three players will vie for control of the hotly contested Archanis Sector and the surrounding space in 2372-2373. One player will take control of Starfleet’s forces in the area and desperately attempt to halt the Klingon advance as the Federation re-tasks its spread out forces. The other two players will each adopt the role of the leader of a Great House tasked with the invasion of Federation space. One player will be House Antaak, the other House Korath. These two players are nominally working together, but as with all things Klingon, cooperation may be difficult.


A Turn

Each turn, the three players will issue orders for their starships and task forces. There will be a number of orders a player can issue to any task force as well as a stance that task force can be set to. When the orders from each player have been received by the game master, the turn will be processed and each player’s files updated. Battles may occur as a result of the issued orders. These battles will be adjudicated by the game master with an assistant if possible. Each turn represents 72 hours. The campaign will last a maximum of 60 turns representing 6 months.


Victory

The victory conditions of the campaign are based on the Confidence of the Federation Council. This is measured as a percentage and based on the control of the various systems, starbases, and listening posts of the sectors as well as the losses Starfleet has suffered and the length of time since the campaign began. Losing any system, starbase, listening post, or starship will decrease the Federation Council’s Confidence. The specific amount that any loss will affect the Confidence of the Federation Council is not visible to either Starfleet or the Klingons but can be roughly inferred through the importance of a system and the size and cost of the destroyed starship. As the campaign progresses the Confidence will increase slowly as the Federation is given the time to mobilize its resources and vast industrial potential. Should the Federation Council’s Confidence ever drop to 40% or lower then the Council will cede the Archanis sector territories to the Klingon Empire and sue for peace. If this has not occurred at the end of 60 turns then the Starfleet player wins.

The two Klingon players will each have an Honor score. Their Honor will take into account the systems and starbases they have captured as well as Starfleet starships they have destroyed. The specific amount that any captured system or destroyed starship will affect Honor is not visible but can be roughly inferred through the importance of a system and the size and cost of the destroyed starship. Their own losses are not included in their Honor. In the event of a loss for the Federation, the Klingon player with the greater Honor is considered the victor and a grand statue of them erected outside the Great Hall. In the event of a Federation victory, the player with the greater Honor will not be stripped of all their lands and titles.


The Map


The map represents a 60ly by 60ly expanse of space along the Klingon-Federation border with the Romulan Star Empire present at the coreward edge. A grid of 60x60 squares lies across the map denoting sub-sectors of 1ly by 1ly. A coordinate system exists to aid in the issuing of orders with a two number system. The first number is the column and the second number the row. Only every fifth sub-sector is labeled to avoid crowding the map.


Federation territory is colored blue, Klingon territory red, Romulan territory green, the Romulan Neutral Zone grey, and unclaimed space clear. Notable star systems are shown with a yellow star icon and the name of the system next to it. Starbases are denoted with a red circle. Neither side may enter the Romulan Neutral Zone or Romulan territory. Starfleet has not been authorized to enter Klingon space by the Federation Council at this time.


Eleven watchtower listening posts along the Klingon border are represented with a red triangle. Three nebulas exist on the map, the Paulson Nebula, Azure Nebula, and Hromi Cluster, and are given a graphic. A sub-sector is considered to be nebula if at least half of it is filled by the nebula.


Faint green lines connect various star systems in both the Federation and the Klingon Empire. These lines represent supply routes with regular traffic of freighters and transports. Should a supply line be compromised due to enemy raiders or the destination be conquered, the route will be colored red. Some systems have a battery symbol in the top left corner of their sub-sector. This indicates that the system houses a supply base capable of topping up friendly starships. Some systems have a wrench symbol in the top right corner of their sub-sector. This indicates that the system houses a repair station for the repair of friendly starships.


Starfleet task forces are represented by a Starfleet com-badge icon. Klingon task forces are represented by a Klingon Empire icon. Both icons, as well as starbases and listening posts, project two colored circles, purple and red, for short sensor range and long sensor range respectively. Short sensor range for all task forces is 1ly. Long sensor range for Starfleet task forces is 10ly and 7ly for Klingon task forces. Starbases have a short sensor range of 2ly but keep the 10ly long range. Watchtower listening posts have no long sensor range but have a short sensor range of 5ly. Each side will not see the sensor ranges of their opposition.


Task Forces


Players will organize their starships into task forces. A task force is a group of starships that are given orders and moved about the map. A task force can consist of one starship. All starships in a task force are located in the same sub-sector. Task forces can be modified at the player’s discretion but only starships in the same sub-sector at the beginning of a turn can be organised into the same task force. New task forces can be created from the constituent starships of a task force at any time. Task forces will be given a number by default but may be renamed at the player’s direction.


Supply


The systems containing supply bases automatically replenish their supply capability each turn assuming an uninterrupted route can be traced through the supply lines off the map. If a supply base cannot do this, its supply inventory is not replenished and therefore finite until such time as the supply line is restored.


All starships have a supply rating representing the amount of consumables carried on board such as anti-matter, deuterium, and other necessary feed-stock and supplies. Each time a starship conducts a rapid move order or engages in any combat, its supply rating is reduced by one. A starship present at a supply base that has been given a resupply order will replenish its supply rating back to its nominal level assuming the base has sufficient supply. Anytime a starship undergoes repairs at a repair station, the accompanying supply base reduces its supply by one. Anytime a starship conducts a field repair order, it reduces its supply rating by one.


A starship with a supply rating of zero is only capable of a move, resupply, or repair order and if forced into battle cannot utilize any on-board torpedo tubes and phasers/disrupters hit with ½ their normal damage (rounded down).


Both Klingon players have the ability to establish a new supply base in a Federation system that has been the target of a successful Invade order. This supply base will create a supply line back to the player’s primary supply base. Each Klingon player may only do this once.

House Antaak’s primary supply base is the Ganalda system. House Korath’s primary supply base is the Beta Thoridor system.


System Control


All systems in Federation space are by default under Federation control. Whenever Klingon starships are unopposed in a Federation system it is under Klingon control. The Klingons can gain more permanent control of a system through an Invade order. A system that has been invaded and now controlled by the Klingons can be the target of an Invade order by a Starfleet task force.


Orders


Task forces can be given any number of orders to accomplish the player’s goals. Only one order can be issued to a task force even if not all the starships contained within it are required or capable of performing the order, i.e. a task force cannot be ordered to move to a system and invade it in the same turn. Whether task forces encounter each other or are able to intercept one another will be determined by the game master taking into account how much each task force has moved that turn and the relative speeds of the starships.


Move: A task force issued a move order must be given a destination within 3 sub-sectors of its current location. A move of 3 sub-sectors is equivalent to Warp 6. A starship can tow another starship up to twice its size (Mass Factor) with its tractor beams on a move order if required. Enemy starships will only be engaged if the move brings them into the same sub-sector. Corner-to-corner moves are not permitted.


Rapid Move: A task force issued a rapid move order must be given a destination but the maximum distance varies. Each class of starship has a rating for Max Cruise Warp which represents the maximum number of sub-sectors the starship can move in 72 hours without damaging the engines, though this will eat through the ship’s supply of anti-matter. A task force on a rapid move order cannot exceed the max cruise warp of the slowest starship within it. Every starship in a task force that performed a rapid move reduces its supply rating by one. Starships cannot be towed with tractor beams during a rapid move order. Enemy starships will only be engaged if the rapid move brings them into the same sub-sector. Corner-to-corner moves are not permitted.


Patrol: A task force issued a patrol order will attempt to engage enemy forces detected within their max cruise warp range within the limit of it’s stance. A task force that engages an enemy task force will expend one supply rating from each of its starships for the move and one supply if they enter combat.


Raid: A task force issued a raid order must be within 1 sub-sector of an enemy supply line. The constituent starships will intercept and destroy or capture enemy supply vessels travelling this route, although this is abstracted. The supply route will be considered compromised by the enemy. Any starships conducting a raid order can replenish their supply rating by one at the end of the turn.


Escort: A task force issued an escort order must be within 1 sub-sector of a supply route. From that point forward the task force’s specific location is no longer tracked. The constituent starships will attempt to escort freighters travelling the designated supply route. If an enemy task force is performing a raid order along the specified supply route there will be a chance that the escorting task force will be present to intervene. Multiple task forces can be set to escort on the same supply route to increase the likelihood of the presence of one of the task forces at an enemy raid. The longer a supply route the lower the likelihood of any one escorting task force being present at a raid. When a task force with an escort order is issued a different order the location it appears along the supply route is randomized.


Resupply: A task force issued a resupply order must be present at a supply base. Each starship in the task force may refill its supply rating up to the maximum assuming sufficient supply at the base. If a supply base does not carry enough supplies to fully restock a task force, the player must specify priority. A resupply order can be issued to a task force not at a supply base in order to redistribute supplies among the constituent starships.


Repair: A task force issued a repair order must be present at a repair station. A repair station can repair up to 5 starships simultaneously. In the event of competing repair needs, the player must specify priority. A repair station can restore up to 20 hull hits in one turn to each starship being repaired. A missing section of a starship will take 3 turns to restore to 1 hull hit remaining. Each starship repaired by a repair station will reduce the supply inventory of the accompanying supply base by 1. Destroyed starships cannot be repaired and are removed from the campaign.


Field Repair: A task force issued a field repair order will fix damage among its constituent starships. Klingon task forces can repair up to 5 hull hits per starship. Starfleet task forces can repair up to 6 hull hits and have a pool of 1 additional hull hit per undamaged starship in the task force to distribute to the damaged starships at the player’s discretion. Destroyed sections cannot be repaired during a field repair order. Disabled systems are automatically restored at the end of a battle.


Invade: A task force issued an Invade order will attempt to wrest control of a system from the enemy utilizing ground forces. If enemy starships enter the system during the turn, the order is voided. When performing an Invade order, the total Marine rating of the constituent starships and the Invasion Difficulty rating of the system are considered in a calculation known only to the gamemaster. If successful, the system will remain in control whether starships are present or not. If not successful, the task force may attempt an Invade order again the next turn.


Tachyon-Net: Starfleet task forces can be issued a tachyon-net order. The constituent starships will establish a tachyon detection grid to discover cloaked vessels in their area. A tachyon-net order requires the task force to include at least 5 starships. Two end points of the detection grid must be specified no more than 5 sub-sectors apart. Any cloaked starship that crosses the sub-sectors of the detection grid is automatically detected. If the tachyon-net task force is set to an aggressive or determined stance, they may attempt to intercept the intruding vessels.


Stance


Task forces must have one of three stances which indicates their willingness to engage enemy forces.


Evasive: A task force set to evasive will always attempt to flee in the face of enemy vessels.


Aggressive: A task force set to aggressive will attempt to combat enemy forces of ~equal combat capability or smaller.


Determined: A task force set to determined will attempt to combat any enemy forces they encounter. Starfleet task forces set to determined will flee if the local commander believes they are outnumbered by more than 2:1 in combat potential.


Sensors


Starships and starbases have both short and long range sensors; listening posts only have short range sensors. Short range sensors are indicated with a purple circle around the source while long range sensors are indicated with a red circle. Enemy task forces outside the sensor ranges of any friendly assets will not appear on the player’s map. Enemy task forces inside long range sensors of friendly assets will appear and the number of constituent vessels noted. Enemy task forces inside short range sensors of friendly assets will have class information listed. Starships in a nebula can only be detected by being in the same sub-sector.


Starships that are cloaked may not appear on the enemy’s map. Any time a cloaked task force performs a move, rapid move, patrol, raid, or escort order that has the force move within sensor range of enemy assets, there is a chance they will be detected. The specifics of this calculation are mysterious and known only to the game master but factor in the number of starships in the cloaked task force, their sensor profiles, as well as the number of detecting starships and the power of their sensors.


Cloaked task forces within short sensor range are at an increased chance of detection. Once a task force has been detected, so long as it remains within sensor range of any asset it will remain detected. The higher the total sensor rating of a Starfleet task force the greater chance of detecting cloaked ships. The lower the total sensor profile of a Klingon task force the lower chance of it being detected. 


Cloaked task forces that are detected with short range sensors have the number of starships revealed not their classes. Cloaked task forces that are detected with long range sensors simply appear as a task force with an unknown quantity of vessels. All Klingon task forces are assumed to be under cloak by default unless otherwise specified by the player.


Reinforcements


The Starfleet player will receive intermittent reinforcements of a progressively larger quantity as the campaign progresses. Starfleet reinforcements will arrive at the edge of the map where the three supply lines exit. The Klingon players can request reinforcements from Klingon High Command or from their own house fleets as part of their orders. Each time a Klingon player requests reinforcements from High Command their Honor is permanently reduced. Each time a Klingon player requests reinforcements from their house fleets their Honor is reduced but by a smaller amount. Reinforcements from the High Command originate from the KDF and are therefore of a higher quality than the house fleets. Klingon reinforcements arrive at their primary supply bases.


Commanders and Crew


Some of the starships under a player’s command will have a flag rank officer aboard. Rear Admirals are one command die, Vice Admirals two command dice, and Admirals three command dice. Each flag rank officer will have a rating of Poor (D4), Average (D6), or Brilliant (D8). When one or more of these commander’s are present in a task force and that task force participates in a battle, a proper chain of command will be established. If no flag rank officers are present at a battle, the captain of the starship with tactical superiority will command the fleet as a single D4 commander with all present starships reporting directly to them.


Starfleet Mission Pods


The Nebula Class and Springfield Class both have interchangeable pods as part of their design. The Starfleet player can order these starships to swap out their pods at any of the four starbases. Doing so takes up a repair slip for 4 turns. The Nebula Class can utilize either the Tactical Pod or SWAC Pod. The Springfield Class can utilize either the Tactical Pod or the SWAC Pod.


Battles


Any time task forces move into the same sub-sector a battle occurs, assuming both task forces are not set to an evasive stance. The sub-sector the battle occurs in will determine the terrain for the table-top battle. Interstellar space will have no terrain while star systems will feature terrain generated from a randomized list. Battles that take place in the nebulas will use appropriate nebula terrain. The Paulson Nebula will use the rules for planetary nebulae. The Azure Nebula will use the rules for supernova remnants. The Hromi Cluster will use the rules for protoplanetary/emission nebulae.


The setup and deployment zones for a battle will be determined by the approach vectors of the participating starships, i.e. a task force being engaged by two enemy task forces from two different vectors would likely fight a flank attack scenario. Reserves will be available in most battles at the discretion of the game master.


Warp Combat


Occasionally with one task force on a patrol order and its target at an evasive stance, warp combat may occur. For the purposes of the campaign, only a stern chase will be modeled. This will occur when one task force is being pursued by another task force of a higher max warp cruise speed and the choice is made not to drop to sub-light for combat. The two forces are deployed 300cm apart with the pursuing force facing the stern of the evading force. There is no plotting or movement as this is mostly a mathematical exercise and could be done on paper.


Only torpedo launchers will function for the battle. The evading force’s torpedo launchers range bands are doubled for the battle to represent the massive closing speed any torpedo fired would have. The evading force may only utilize aft facing weapons. The pursuing force may only utilize bow facing weapons.


The battle will begin at 300cm with a round of firing (probably only the evading force considering the range). Each subsequent round the pursuing force is moved forward 30cm per difference in the max warp cruises of the two groups, i.e. a task force with a speed of 6 is being pursued by a force with a speed of 8, each turn the pursuing force will be moved 60cm closer to the evading force. When the two sides reach 30cm, the range stops closing as this will be point-blank for most launchers. The game will end when either the pursuing force or the evading force are destroyed, or the pursuing force chooses to break off.


End of rules.


These are the constraints the three players are operating under. There are a number of things they are not privy to such as the specific mechanics of reinforcements and detecting cloaked starships. This is mostly to maintain some level of mystery and avoid gaming of mechanics.

-----------------------------------------


Part 2 - The First 15 Days


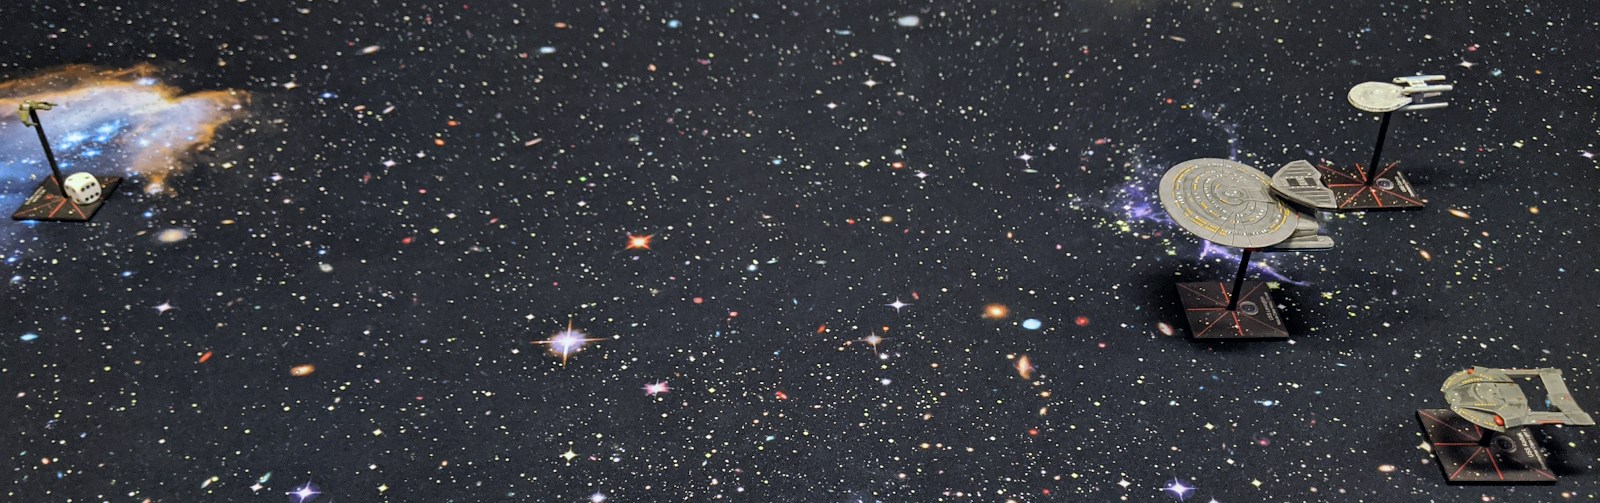
The campaign opened with cautious moves by House Korath in the coreward end of the engagement zone, near Romulan space. Every Starfleet warp signature detected in this area moved away from the advancing Klingons. However, at the rimward end, House Antaak struck deeper into Federation space aiming for Archanis, Ajilon and Zeta-Polaris. Here too, Starfleet seemed to pull back in the face of the mighty Klingon fleet. But the evolving situation was not without incident. House Antaak's main fleets were preceded by scouting groups of Birds of Prey. Operating in squadrons of six vessels, these ships were acting as the forward eyes of the invasion. They were also easy pickings for the scattered Starfleet forces.


D+3 through D+6

Suddenly, some of the retreating Starfleet ships turned around and intercepted the Klingon escort screen. Six B'Rel Class Birds of Prey entered the Ajilon system, scouting ahead of the main fleet and the system appeared empty but long range sensors showed a single warp signature inbound. The Klingon squadron leader deemed that a lone Starfleet vessel could likely be dealt with. He thought that until the ship dropped out of warp.


Being used as a fast reaction force, an Akira Class Heavy Cruiser had pounced on the intruding Klingons. Six B'Rels wouldn't be enough.


Adding insult to injury, this Akira also had an on-board compliment of Peregrine Attack Fighters, though only six of them.


The Peregrines quickly closed the distance to the Birds of Prey, and though they were cloaked, the fighters simply flew up to point blank range and fired on the visual distortions. In short order three B'Rels died. Just to starboard, the other three Birds of Prey were subject to a blind bombardment of photon torpedoes from the Akira. This is normally a futile endeavor for a starship, but the Akira's vast array of torpedo tubes is not normal. One lucky torpedo managed to hit a Bird of Prey, which of course did not have shields up while cloaked, destroying the starship instantly.


In a desperate charge, the Klingons sailed in to close range and loosed a few torpedoes at the Akira hitting her shields and scorching her paint through splash damage. The last two Birds of Prey ceased to exist moments later.


Only light years away and at nearly the same time, another squadron of B'Rels encountered a group of four Starfleet vessels. These Starfleet ships had run down the Birds of Prey who were forced to drop out of warp.


While this engagement did not have the awesome torpedo power of an Akira, it did have an Excelsior Class Explorer, Springfield Class Frigate, Miranda Class Destroyer, and an Oberth Class Science Vessel. The Oberth was obviously the linchpin to this task force's future success.


The Starfleet vessels, after dropping out of warp to the Klingons stern, immediately punched it with their impulse drives, except for the most important vessel in the group, the Oberth, which hung back.


The Klingons came about and split onto two different vectors hoping to split up the Starfleet force.


Three B'Rels faced the Miranda which turned to starboard to prevent them from reaching the Oberth. The Klingons on this flank dropped cloak and loosed torpedoes at the old destroyer dealing significant damage to her primary hull. For their efforts the Birds of Prey were hit by no return fire.


On the other flank, the remaining Birds of Prey danced with the Excelsior and Springfield. It became apparent quite quickly that the Springfield had an SWAC pod installed as she and the Excelsior speared one ship even while it was cloaked.


In the dance that proceeded, the Miranda faced three Birds of Prey attacking her flank at close range while the remaining two had faked out the larger ships into turning the wrong way giving her a clear line of fire on the Oberth. In seconds the Miranda was destroyed by Klingon torpedoes and the Oberth followed moments later. However, the return fire destroyed three of the five Birds of Prey. The following command roll saw the Klingon morale break. The rules state that a fleet loses at this point, however, being a campaign this could mean surrender or perhaps a failed attempt at retreat. You decide.


D+7 through D+15


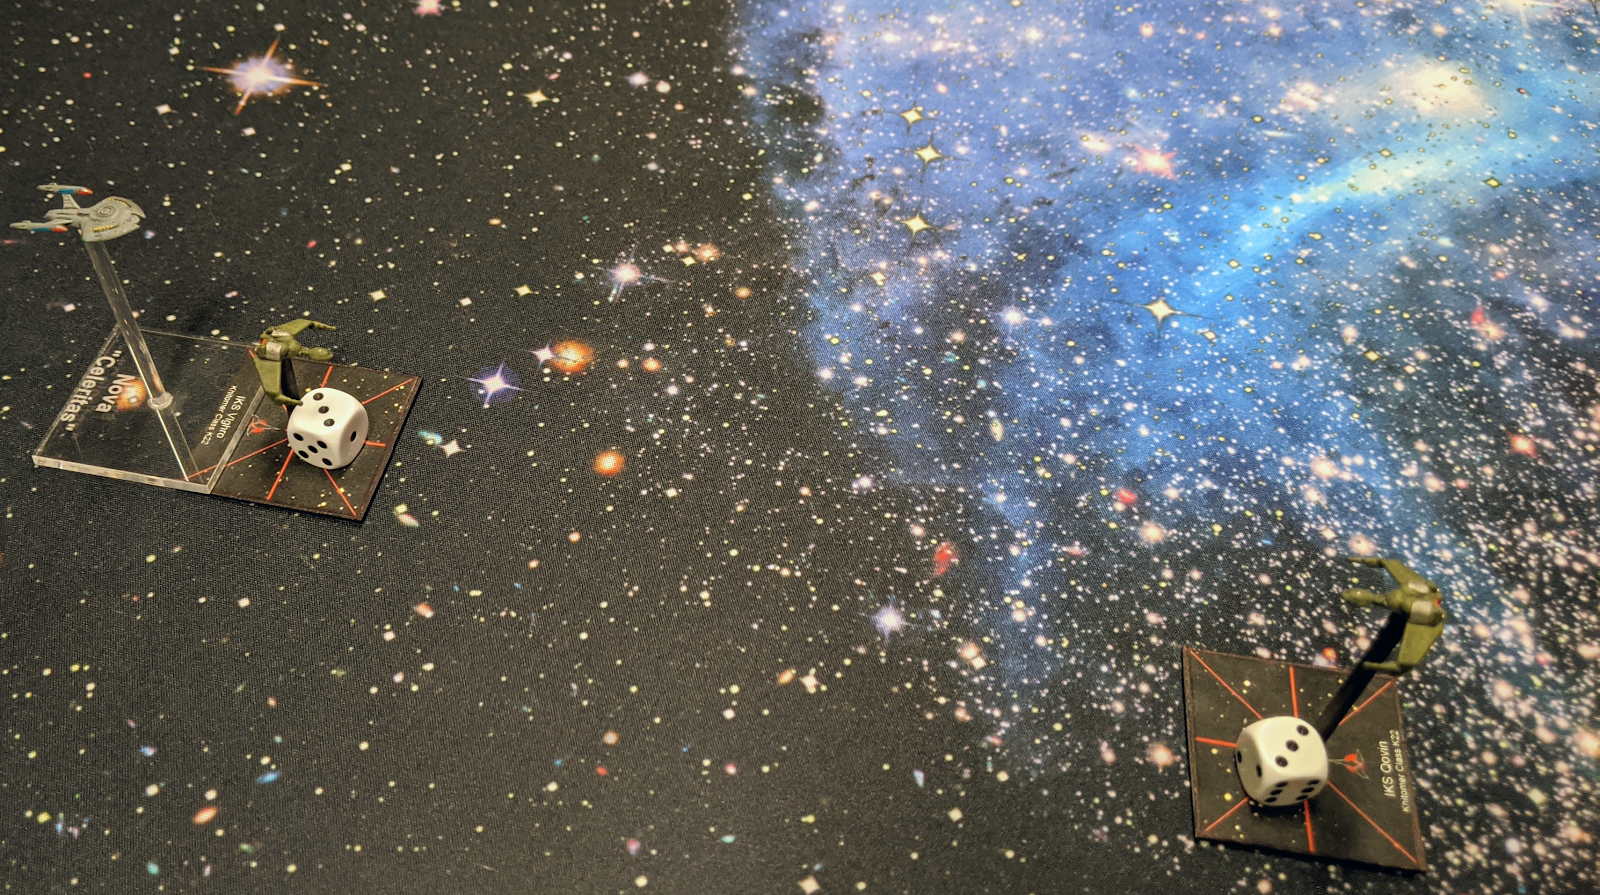
The following week of the campaign continued to see Starfleet retreat in the face of the Klingon advance. Archanis fell to a ground invasion followed by Carraya where House Korath established a forward supply base. Meanwhile the scouting parties of both houses pushed deeper into Federation territory until two more were intercepted by Starfleet, this time it was House Korath who would lose some Birds of Prey.


Near Starbase 24, a squadron of three B'Rel Class Birds of Prey noticed Starfleet warp signatures in hot pursuit. Unable to outrun the pursuers, the Birds of Prey dropped out of warp and prepared to fight.


This task force of Starfleet ships included an Excelsior Class Explorer, Intrepid Class Light Explorer, New Orleans Class Frigate, and a Cheyenne Class Frigate. Aside from the Akira, this was the strongest Starfleet force to hit the table yet.


The two sides closed together at a good rate with the Birds of Prey launching torpedoes and missing with every one. Starfleet blindly fired every phaser and torpedo in arc and in a stroke of either luck or probability, felled one Bird of Prey.


Realizing that the Klingons were about to be inside their formation, Starfleet performed a curious maneuver. The Excelsior hit the brakes, the Cheyenne and New Orleans turned inwards, and the Intrepid flipped end for end. This ensured that all arcs were covered by torpedoes and phasers. The two remaining Birds of Prey fired torpedoes into the Cheyenne scoring hits on her nacelles but they quickly died now that their cloak was down.


A few days later and only a few light years coreward, three more Birds of Prey from House Korath encountered another Starfleet taskforce.


This time Starfleet had brought out the big guns in the form of a Constellation Class Cruiser. The Nebula beside her was more a hindrance. The Steamrunner was ok.


The Klingons were again faced with flying into the front of a Starfleet group bristling with torpedo tubes. Thankfully this time the gods of probability were with them as they managed to close the distance intact.


However, once they reached close range, the Nebula managed to get a partial lock on the Klingons and speared one with two phasers. As compensation the Birds of Prey landed a few torpedoes on the saucer section of the big ship, scorching her hull. The wing-tip disruptors merely splashed on the powerful shields.


This Starfleet group attempted a similar maneuver as the previous encounter with less success. However, it mattered little as the two remaining Birds of Prey were at point blank range to the Nebula which promptly destroyed one. The remaining Klingon ship swiftly attempted to retreat and was destroyed.


This accounts for the first two weeks in campaign and nothing beyond skirmishes and the continual retreat of Starfleet has occurred. I think the Klingons had actually gotten nervous due to the lack of resistance. In two weeks of fighting they had conquered two systems, including the namesake for the war, and only lost twelve B'Rel Class Birds of Prey.


That all changed in the next week.


-----------------------------------------


Part 3 - Day 16 to 24


The movement portrayed here is an average of the fleet movements not the specific path of any one fleet.


The next week of the campaign saw continued maneuvers by both fleets. Starfleet again gave ground to the Klingons and began to consolidate its spread out forces into what became known as Death Balls. Meanwhile the Klingons advanced further into Federation space.


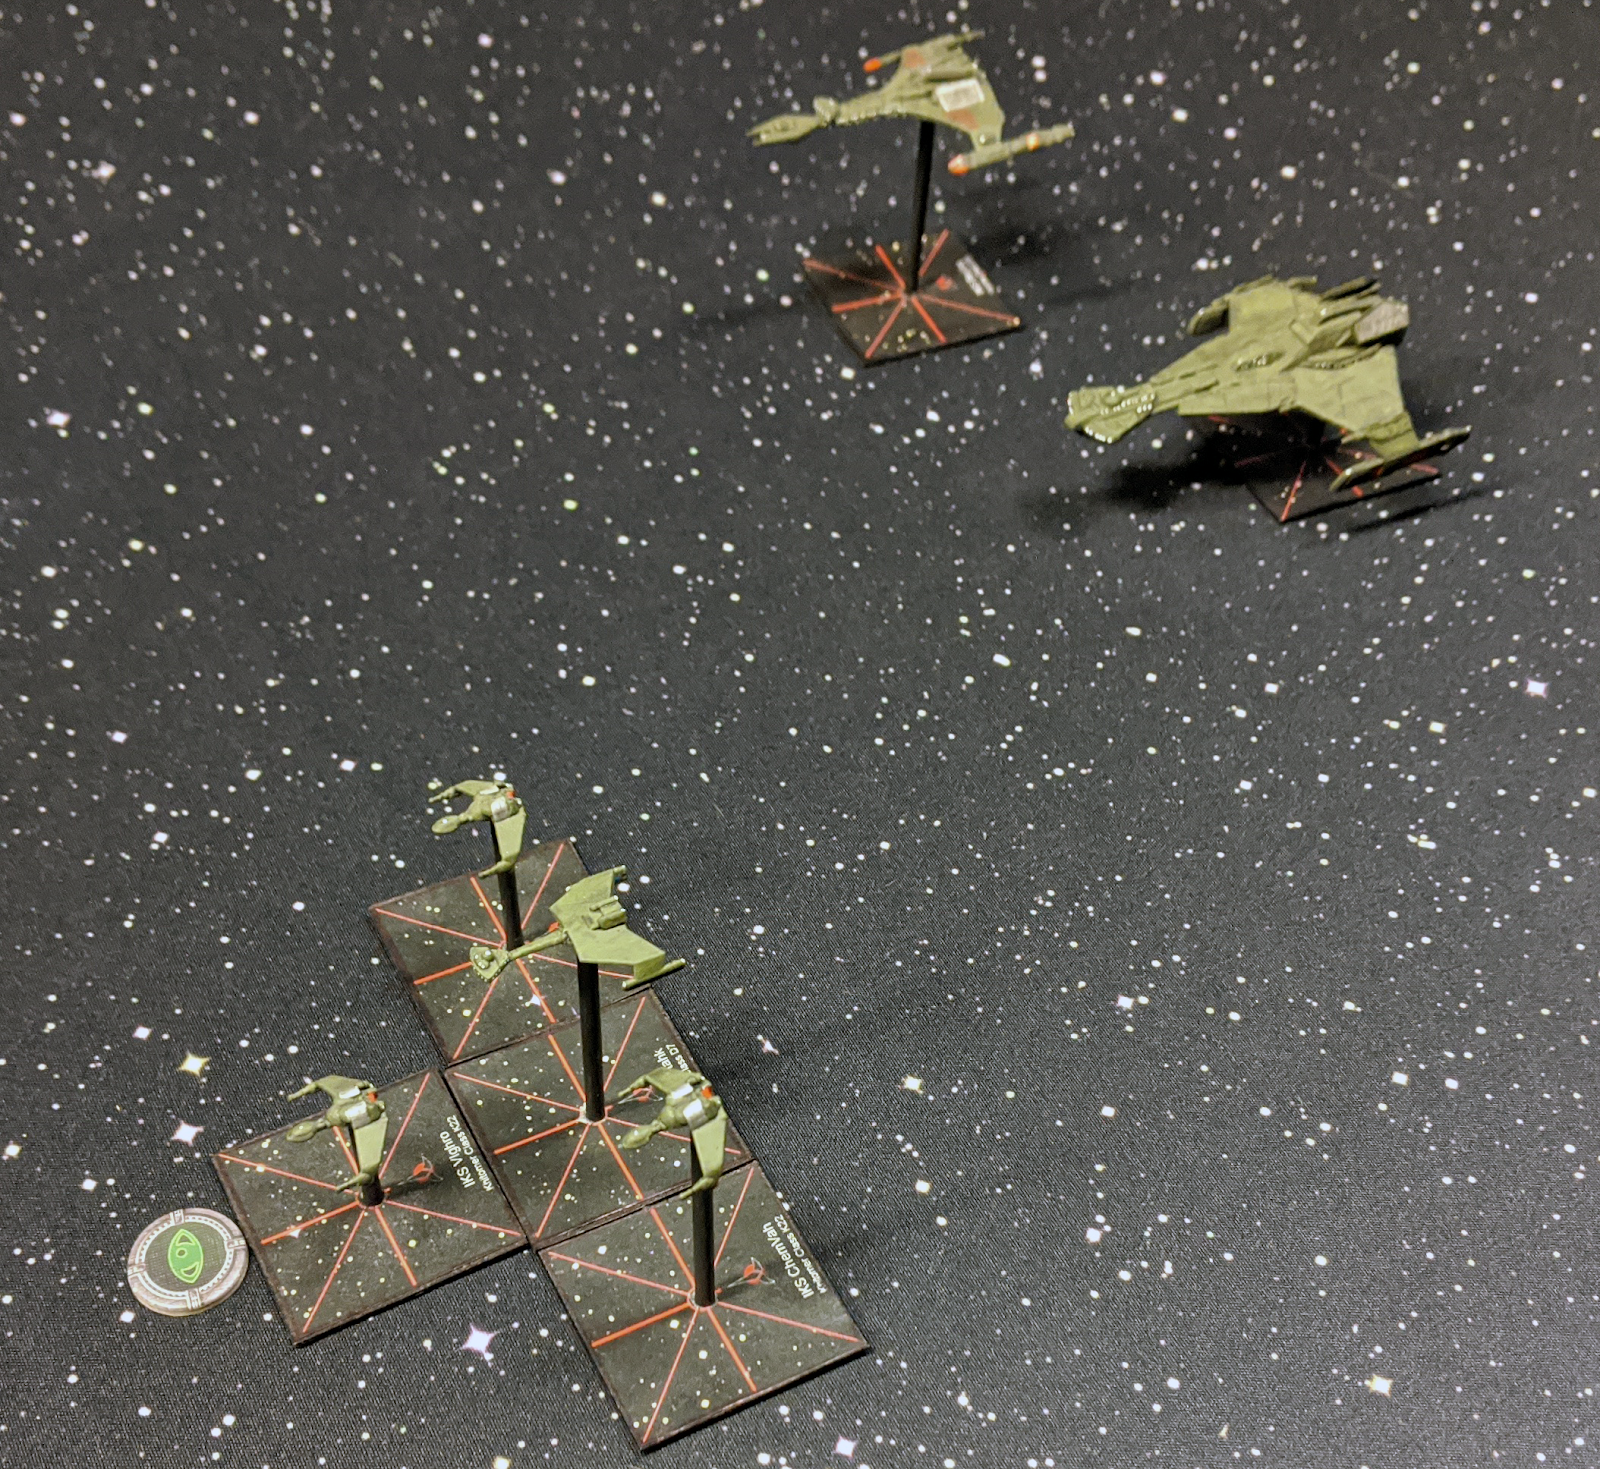
House Antaak successfully invaded the Ajilon system extending its control of the rimward section of the border. House Korath advanced to and successfully invaded the Carraya system. They then established a new supply base in the system to extend the reach of their fleets. Around Starbase 24, groups of House Korath Birds of Prey played cat and mouse with Starfleet vessels with no weapons being fired, only the war of sensor technicians and cloaking devices.

It was the coreward region that next saw action after the invasion of Carraya. Unable to tolerate this foray into the region, Starfleet mobilized one of its new concentrations of starships and headed out to push the Klingons back.


D+16 through D+24


Rimward of Carraya, a Klingon task force detected incoming Starfleet warp signatures and prepared for battle. The task force was comprised of two Vorcha Class Attack Cruisers, two K'Tinga Class Battlecruisers, one K'Vort Class Light Cruiser, and nine B'Rel Class Birds of Prey. This was a force that would make Starfleet wince.


But then Starfleet dropped out of warp with a wince inducing force of their own. Two Nebula Class Heavy Cruisers, two Excelsior Class Explorers, one Constellation Class Cruiser, one Challenger Class Light Cruiser, one Steamrunner Class Light Cruiser, one Intrepid Class Light Explorer, one New Orleans Class Frigate, two Cheyenne Class Frigates, one Freedom Class Destroyer, and one Saber Class Scout made for an imposing sight. The Klingons would have a good fight!


Immediately the Klingon fleet accelerated towards Starfleet with the Birds of Prey swinging left while a Vorcha and K'Vort swung right.


Starfleet pressed forward and launched a few surprises for the Klingons. Each Nebula launched three Peregrines and the Steamrunner launched a duet of Danubes.


But the Klingons had a surprise of their own. The command Vorcha was a carrier variant and launched two flights of To'Duj Interceptors. Unusual for Star Trek, it appeared there might be a dogfight.


With the unexpected launch of Klingon fighters, Starfleet at first seemed unwilling to commit their Peregrines and Danubes. The two fleets continued to close with one another. The Starfleet line blindly fired torpedoes and a few phasers with almost all missing their mark. However, a lucky hit on a B'Rel consumed it in anti-matter fire.


While the forward Vorcha and K'Vort charged at the Cheyennes, the B'Rel line hooked around the left flank. To counter this move, Starfleet moved its reserve of the Saber and Intrepid to reinforce the flank.


Meanwhile the Klingon command group held back surveying the progress of their forward elements. The Vorcha and her K'Tinga escorts provided long range fire support to the forward groups targeting the New Orleans stripping her forward shields bare and ravaging her saucer section.


Starfleet countered the charge of the forward group by dispatching six Peregrines to take down the K'Vort. In response, the To'Duj Interceptors raced to the light cruiser's aid. The ensuing dogfight would take down half the Klingon fighters and two of the Peregrines. Four of the Peregrines ignored the Klingon fighters and attacked the K'Vort over the next minute bringing her shields down and destroying her. Before her death, the K'Vort struck at one of the Cheyennes nearly wrecking the four nacelled ship. The Vorcha targeted one of the Nebulas and seriously weakened her forward arc. In return, Starfleet focused their fire and annihilated the Vorcha with extreme prejudice.


In an attempt to disrupt the Klingon command group, the two Danube runabouts attacked one of the K'Tingas, but in the face of these Klingon warships the two tiny craft were quickly dispatched. On the left flank the Birds of Prey concentrated fire on the Challenger and dealt serious damage to her saucer section.


With the destruction of the forward Vorcha and K'Vort, the Klingon command group committed itself to the melee. Starfleet performed a series of bold g-force intensive maneuvers, flipping many ships end for end or turning hard 180 degrees to bring fresh shield arcs to bear. All in an attempt to rob the Klingons of kills.


The next few moments saw the concentration of Starfleet firepower on the remaining Klingon heavy ships, enough firepower that the crews of the Vorcha and both K'Tingas greeted each other in Sto'Vo'Kor. In an act of either desperation or rage, the Klingons focused their weapons entirely on the Intrepid which had wandered into the middle of the firefight. In a handful of seconds, Voyager's cousin was drifting debris. The remaining Birds of Prey attempted to retreat from the field but were destroyed by pursuit fire.

This battle was definitely a tactical victory for Starfleet having destroyed several Klingon warships including two Vorchas, but they did lose an Intrepid and fly away with five ships in need of serious dock time. At least the Klingon advance coreward had been slowed for the time being.

-----------------------------------------


Part 4 - Day 25 to 33


The movement portrayed here is an average of the fleet movements not the specific path of any fleet and also only shows those movements at the front lines.

The next few days of the campaign saw a flurry of maneuvering and action. House Antaak established a supply base in the Zeta-Polaris system to further the reach of their fleets while House Korath conquered the Acamar system. The fact that the Acamarians are not even members of the Federation did not seem to bother the Klingons.

Coreward, House Korath engaged in a kind of standoff with the Starfleet forces in the area. Both sides were aware of each other and knew their opponent possessed significant numbers of starships and neither side was willing to pull the trigger. Between Starbase 24 and 343, small groups of House Korath ships danced with their Starfleet counterparts hoping to infiltrate the lines. Two such task forces were forced to run for the protection of the Hromi Cluster with a squadron of Starfleet ships hot on their tails, just barely making it into the clouds of dust and gas.

Rimward, House Antaak continued to push against the Starfleet lines focusing on two axis; one towards Xarantine and the other towards Starbase 24.

D+25 - D+27


The Xarantine system houses a Starfleet ground supply base and hosted a small garrison force of Starfleet ships. This garrison detected cloaked warp signatures incoming to Xarantine and moved out to intercept them. A Nova Class Science Vessel and a Miranda Class Destroyer [Tempest Subclass] would be able to deal with a few Klingon ships.


However, as they raced out of the system, another group of Klingon ships intercepted them in turn. Six B'Rel Class Birds of Prey forced the Starfleet ships out of warp and an unexpected battle began.


As the two groups engaged their impulse engines, the Miranda took point position to protect the smaller science ship.


Bravely she closed to point blank range and blind fired her torpedoes and phasers at the cloaked targets. In return the Klingons dropped their cloaks and put everything they had into the stalwart ship. Pulse disruptors and torpedoes tore into the century old ship and in a handful of seconds she was destroyed.


All that was left was the 'helpless' science vessel. Three Birds of Prey hung back while the other three sped forward and performed a loop to hopefully catch the enemy in a cross fire. However, the Nova predicted this maneuver and slammed on the brakes leaving her outside the Klingon's kill box. In short succession she speared two Birds of Prey with phaser fire and they exploded. Unfortunately, she was still only a science ship and was quickly destroyed by the remaining Klingons. The way to Xarantine was open.

D+28 - D+33


House Antaak had been advancing relatively unopposed in the space between Archanis and Starbase 24 but Starfleet aimed to blunt that advance. A task force was formed centered around the Admiral's flagship, an Ambassador Class Explorer. She was joined by three Excelsior Class Explorers, one Norway Class Destroyer, one New Orleans Class Frigate, and one Springfield Class Frigate with an SWAC pod installed. This was not the most powerful group Starfleet had but it should be good enough for the job asked of it.


Flying smack into the face of the Klingon advance, Starfleet faced a Klingon group of one Vorcha Class Attack Cruiser, one K'Tinga Class Battlecruiser, five B'Rel Class Birds of Prey, and six Khitomer Class Birds of Prey. The Khitomer Class are the newest Bird of Prey design and come from the KDF forces. Until this point Starfleet had only faced the house fleets primarily composed of older designs. House Antaak had requested reinforcements it appeared.


The two fleets closed the distance at full impulse with the Klingons waiting to drop their cloaks until optimum range.


As the range closed the Ambassador launched a pair of Danube Runabouts to assist the fleet.


These jinky gunboats were immediately dispatched to thin the herd of Birds of Prey. Curiously the Vorcha and her K'Tinga escort dropped their cloaks while the Birds remained cloaked. Starfleet began to concentrate their firepower upon the Vorcha hoping to cripple the powerful vessel before it could close but the range was long and little damage was achieved. The return fire from the Vorcha was equally disappointing. The Danubes, however, did not disappoint, killing two Khitomer Birds of Prey over the next few minutes.


With the Vorcha and K'Tinga engaged in a gunnery duel with the Excelsiors, the Birds of Prey raced ahead under cloak towards Starfleet's center. Starfleet kept their center strong and swung the New Orleans and Norway out to the flanks but did so a little too early. In the ensuing firefight the Vorcha had her forward shields dropped and her hull lightly scorched. In response an Excelsior was gutted and destroyed but not before three more Birds of Prey sailed for Sto'Vo'Kor.


As the fleets closed it became obvious what the Klingons were attempting to achieve. The Birds of Prey flew past the main line and decloaked pouring fire into the Ambassador to keep her busy. Meanwhile the Vorcha and K'Tinga got so close to the enemy they could have boarded by simply jumping out an airlock. The next few seconds found both the remaining Excelsiors destroyed. For her efforts, the Vorcha no longer had bow, port, or starboard shields and her hull was breached in multiple locations while the K'Tinga was reduced to drifting debris.


Thinking that the Vorcha would continue on to capitalize on the light damage dealt by the Birds of Prey, the Ambassador and Springfield turned to starboard unmasking their rear torpedo tubes. However, the Vorcha was not aiming for the flagship. Performing a high G flip, she came about to attack the remaining frigates with the Birds of Prey hot on her heels. The Vorcha was so damaged at this point it was simple for the Starfleet ships to finish her off but at this range her remaining weapons backed up by the torpedoes of the Birds of Prey tore the Norway apart.

With their command ship destroyed, the remaining Klingon ships attempted to flee but were chased down and destroyed by the Starfleet survivors. The toll for this battle was heavy. The Klingons lost one Vorcha, one K'Tinga, three B'Rels, and four Khitomers. To achieve these kills Starfleet lost three Excelsiors, one Norway, and two Danubes. Even though Starfleet claimed a tactical victory, the Klingons celebrated a glorious battle.

-----------------------------------------


Part 5 - Day 34 to 60


The movement portrayed here is an average of the fleet movements not the specific path of any fleet and only shows those movements at the front lines.

The second month of campaigning centered on the actions of House Korath and its many Birds of Prey. General Korath had separated his many small scout ships into wolf packs and dispersed them across the battlefront, penetrating Starfleet's lines to cause as much chaos as possible. This lead to Starfleet assigning a noticeable portion of the fleet to escort duty along the supply routes. Smartly, Admiral Gow mostly assigned older, slower vessels like Mirandas, Constellations, and a few Excelsiors leaving his more powerful, faster vessels to form combat groups. As his Birds of Prey were causing problems behind enemy lines, General Korath also conquered the Adelphous system.

For his part, General Antaak was not idle. With Starfleet pulling back to his front, the General conquered the Omega Leonis, Fortuna, and Alpha-Hromi systems. On his other flank his forces secured orbital control of Xarantine and pushed fleets past the system opening up Starfleet's rear.

D+34 - D+39


One of House Korath's raiding groups believed it had found a juicy target when it tracked onto a slow moving collection of six warp signatures. The three B'Rel Class Birds of Prey pursued the group and dropped to impulse.


Unfortunately, this group was not only defenseless merchantmen. Three of the sensor contacts were escorting Miranda Class Destroyers. Not deterred but emboldened, the Klingons accelerated to full impulse.


Following standard procedure, the Starfleet ships turned into the Klingons while the freighters made to escape.


The B'Rels danced and weaved under cloak closing the distance. Starfleet fired a few errant torpedoes hoping to get lucky to no avail. Finally, the Klingons closed to point blank with the Mirandas and dropped their cloak. Disruptors and torpedoes targeted the nearest Miranda and left her a drifting debris field. For their efforts, the three B'Rels were quickly destroyed. One less Klingon raiding group could annoy Starfleet but they had one less old destroyer to combat them with.

D+40 - D+51


Eventually Admiral Gow felt that he had assembled a strong enough task force to push back against the forces of House Korath and their salient around Carraya and Acamar. Setting out from Starbase 157, 14 ships headed to Acamar to confront the Klingons. Two Nebula Class Heavy Cruisers, three Excelsior Class Explorers, one Constellation Class Cruiser, one Challenger Class Light Cruiser, one Steamrunner Class Light Cruiser, two New Orleans Class Frigates, two Cheyenne Class Frigates, one Freedom Class Destroyer, and one Saber Class Frigate made for an imposing force.


The Starfleet force dropped out of warp in the Acamar system and got a look at the opposition for the first time. Five Vorcha Class Attack Cruisers, one Karas Class Strike Cruiser, three K'Vort Class Light Cruisers, five K'Tinga Class Battlecruisers, nine B'Rel Class Birds of Prey, and six Khitomer Class Birds of Prey. Taking one look, the Starfleet group immediately reversed course and headed back to the starbase. The Acamarians weren't that important apparently.

D+52 - D+60


The raiding groups of House Korath had become ever more successful and ever more bold intermittently disrupting supply shipments across much of the sector. One squadron chased down a tempting target, dropped to impulse and prepared for combat.


Unfortunately, again the target convoy was escorted. One Constellation and two Mirandas awaited the annoying little Klingon ships.


Just as before the Starfleet ships turned to face the Klingons while the civilians made a run for it.


At medium range Starfleet began a blind torpedo bombardment of the cloaked ships and got lucky. One B'Rel Bird of Prey was struck by a photon torpedo while cloaked and therefore without shields. It died in an antimatter fire.


The bad luck of the Klingons did not end with a lucky torpedo. Screaming towards Starfleet at full impulse the two remaining Birds of Prey performed an end-to-end flip attempting to bring themselves into the enemy's rear. Starfleet had predicted this maneuver with the Constellation going full reverse and the flanking Mirandas turning inwards. A perfect kill box had been created. Though the Klingons were still cloaked, at this range the chances were not zero to achieve hits and another bird bit the dust.


Realizing that the only two options were Sto'Vo'Kor or Gre'thor, the Klingons chose the former. Cutting their velocity even further by flipping again, the Klingons dropped their cloak and opened fire flashing the shields of the closest Miranda. For their valiant action, the last remaining Bird of Prey joined its brothers.

These small actions (and one denied action) along with a couple actions involving only a single Bird of Prey that didn't warrant photos, brings the campaign to the end of the second month. 60 days have now transpired and the Klingons have made significant gains. Starfleet, in response, has established an extensive network of escorts for it's supply routes and is forming strong battle groups to retake conquered space. The next month could decide the campaign.

-----------------------------------------


Part 6 - Day 61 to 72


The movement portrayed here is an average of the fleet movements not the specific path of any fleet and only shows those movements at the front lines.

As the Federation-Klingon War progressed into it's third month Starfleet's position got more tenuous but also hopeful. House Antaak continued its conquering spree adding the Ceti-Gamma and Xarantine systems to its holdings while making a push towards Ramatis and Korvat. House Korath continued its efforts to be the most annoying group of Klingons with its many dispersed raiding squadrons. However, Starfleet had by now amalgamated enough forces to form a second battle group based out of Starbase 343, joining the first group out of Starbase 157. Feeling confident, these groups pushed out from their home bases to take back the space that had been lost over the previous two months.

D+61 - D+66


Throughout the campaign, Starfleet forces had been streaming into the area in small groups, coalescing the disparate elements of the 22nd Fleet. One such group of reinforcements, an Excelsior Class Explorer and a Defiant Class Escort, were travelling to Starbase 157 when they detected a cloaked ship nearby. Laying in a pursuit course these starships expected to encounter one of the many annoying Birds of Prey of House Korath.


What awaited them was something else entirely. Somehow a lone Vorcha Class Attack Cruiser had infiltrated the lines and ended up near the supply line feeding Starbase 157. Who knows the damage the Klingon capital ship could have caused had it continued on undetected.


The two Starfleet ships hit the gas and sped towards the Vorcha which dropped its cloak and opened up long range torpedo fire against the Excelsior. At this range the torpedoes either missed or were shot down.


As the range closed the Vorcha was forced to switch targets. The Defiant had pushed ahead of the Excelsior and was flying right down the throat of the bigger Klingon ship. Pulse phasers and quantum torpedoes tore open the front of the Vorcha leaving the front half a burning wreck. However, simultaneously, the Vorcha's many disruptors and torpedo tubes dropped the forward shields of the Defiant and then something unexpected happened. Klingons began beaming over to the cramped little ship. Bat'leths clashed with phaser rifles and though the crew put up a valiant fight there were too many Klingons. In the midst of the brawl main power was knocked out and the ship left adrift at nearly 0.25c.


This left the Excelsior in an interesting situation as she now faced a half dead but still fighting Vorcha. She didn't flee and she didn't turn to fight, rather she chased after the Defiant and beamed some of her security teams over in an attempt to retake the ship, a fight that would continue for a while yet. The wounded Vorcha began a lazy turn and fired its meager side weapons into the rear of the Excelsior.


Having deposited some of her crew onto the Defiant, the Excelsior turned back to face the Vorcha. At medium range the two ships tore into one another until almost at the same time the Excelsior suffered a war core breach and the Vorcha broke apart from extensive damage. This left only a drifting and captured Defiant. The crew from the Excelsior that beamed over managed to eliminate half the Klingon boarders but were themselves put down. This left ~60 Klingons on a captured Starfleet ship drifting into the void at 1/4 light speed with main power shut down and the computer locked out. It would be a cold lonely death.

D+67 - D+72


After having chased off Starfleet's primary force in their area, the main fleet of House Korath sought to remove a thorn in their side. Almost from the beginning of the campaign, Starbase 234 had been cut off from Starfleet support by the Klingon advance and left out to dry. Warping into the system, General Korath intended to destroy the starbase with a fleet of five Vorchas, one Karas, three K'Vorts, five K'Tingas, and six Khitomers.


Starbase 234 was a Sigma Class Starbase (the same as Starbase 375 in the Dominon War), not the most powerful of starbases but nothing to dismiss out of hand.


Immediately upon entering the system the Klingons began launching To'Duj Class Interceptors. Two of the Vorchas were Block Ds, a carrier variant.


The Klingons were right to bring carrier support as in response the starbase launched six Peregrine Attack Fighters and two Danube Runabouts.


The Starfleet small craft flew out to the Klingon right flank intending to deal with the Birds of Prey deployed there. The To'Duj Interceptors moved to counter them.


What followed was a bloody dogfight that felt out of place in Star Trek. Both Danubes and five of the Peregrines were destroyed along with almost all the To'Dujs. Critically, Starfleet's objective had not been met, the Birds of Prey were safe.


For a while the Klingons flew towards the starbase at 1/2 impulse happy to lay down a torpedo bombardment against the immovable station. The starbase responded with the torpedoes it had in arc.


Finally, the Klingons felt like they had softened up their target enough and began a full burn acceleration towards the starbase turning their flanking escorts inwards. In the ensuing seconds the Starbase's facing shields began to buckle under the strain.


With the Klingons closing, the range was becoming optimal for phasers and the starbase reached out and eliminated a K'Tinga and a K'Vort  like they were composed of wet cardboard. In return the Klingons finally dropped the shields of the Starbase and landed hits directly to the hull but she was a big target and not easy to put down (the model I have is for Regula 1 and not to scale with the other models).


It became clear that even with her shields dropped, Starbase 234 was a tough nut and so the Klingons pulled their flanking escorts out of the line of fire to let their heavies do the work. The Starbase still managed to destroy two more K'Tingas over the next few seconds. But the fire against her was too great and too concentrated on one sector and she eventually broke up. A starbase like this is best utilized with a defending fleet to ensure the enemy must maneuver. Otherwise, the attacker can simply stack their firepower against one area.


While General Korath was destroying Starbase 234, Starfleet punched into her strategic rear. The battle group from Starbase 157 launched for Carraya with the intention of seizing the supply base the Klingons had setup there. Having achieved orbital control, Starfleet prepared to land security on the planet and clear the Klingons out.


However, having noticed Starfleet's adventures at their supply base, the Klingons moved to perform a spoiling attack. A Qeh'Ral Class Dreadnought, Vorcha Class Attack Cruiser, K'Tinga Class Battlecruiser, and three B'Rel Class Birds of Prey would not be enough to push Starfleet out of the system but it might be enough to delay them until the rest of the fleet could return from their escapade at Starbase 234.


The Starfleet force pushed out of orbit of Carraya and moved to intercept the Klingon interlopers. This fleet had been seen before the only change was the dropping of its slower Excelsiors and Constellation at Starbase 157.


The Qeh'Ral and Vorcha dropped their cloaks while the K'Tinga and Birds of Prey raced forward at full impulse.


At long range Starfleet began salvo firing their torpedo launchers at the Qeh'Ral Dreadnought with the Klingons doing the same in return against one of the Cheyennes. Neither side achieved much success with the Klingon torpedoes intercepted by accurate phaser fire and the Qeh'Ral's shields standing up to the Starfleet torpedoes.


To deal with the cloaked escorts, Starfleet launched Peregrines and Danubes.


Four Peregrine Attack Fighters and four Danube Runabouts intercepted the K'Tinga and B'Rels. These ships were forced to drop their cloaks for fear of the Starfleet small craft chasing them down and firing on them without shields. Using disruptors and torpedoes the Klingons managed to destroy the Peregrines but the Danubes made it to their targets. Over the next minute all four Klingon ships were destroyed.


This left only the Vorcha and the Qeh'Ral facing an entire fleet and the Qeh'Ral's forward shields were on the brink of collapse from the torpedo bombardment. In the finest traditions of the Klingon Empire these two ships did not waiver, instead they pushed their impulse engines to the max and fired every disruptor and torpedo tube they had at the two New Orleans Frigates destroying them quickly. In return a massive wave of burst fired photon torpedoes and phaser strikes left only atomized dust where once flew two ships.

These battles brought the campaign to day 72 (turn 24) and upon the input of data and results a terrible discovery was made. The confidence of the Federation Council that Starfleet could achieve victory had slipped to 39.76%. The victory conditions for the campaign stated that if the confidence dropped to 40% or below before turn 60 then Starfleet loses. The campaign was over.

24 turns of grinding, fighting, pursuing annoying Birds of Prey, and chasing tails led to the Federation Council asking for peace. Right as Starfleet had finally mobilized and was on the verge of pushing the Klingons back. An analysis of the force disposition and deployment showed that the next turn Starfleet would have been reconquering lost systems and raising the confidence score. The campaign came down to one turn, to one lost frigate even. If one of the two New Orleans Frigates had survived the campaign would have continued. That close.

The only thing left to do was figure out which of the two Klingon players had won.

General Korath had conquered Carraya, Adelphous, and Acamar. He had destroyed one Defiant, one Excelsior, one Miranda, and two New Orleans.

General Antaak had conquered Archanis, Xarantine, Ajilon, Omega Leonis, Fortuna, Zeta-Polaris, and Ceti-Gamma. He had destroyed three Excelsiors, two Mirandas, one Norway, one Nova, and one Oberth.

However, General Antaak had requested significantly more reinforcements than General Korath. Apparently, House Antaak could only achieve those impressive results with outside help.

Adding up the honor scores for the two houses, House Korath finished the campaign with an Honor of 48 while House Antaak had an Honor of 55. General Antaak would have a statue of himself erected outside the great hall and songs sung in his name. General Korath would have to make do with several barrels of 2309 Blood Wine.

Thank you to Adam, Phil, and Chris for playing my little game. It is always fun to watch players dance around a map blindly attempting to "win" a contest with somewhat nebulous conditions. All three were great sports and had a great time. There will be more campaigns coming soon with the next one possibly being a cross universe adventure.

The rules for the tactical gameplay is Metaverse second edition which can be found here.

Join us on Facebook.

Comments

Popular Posts